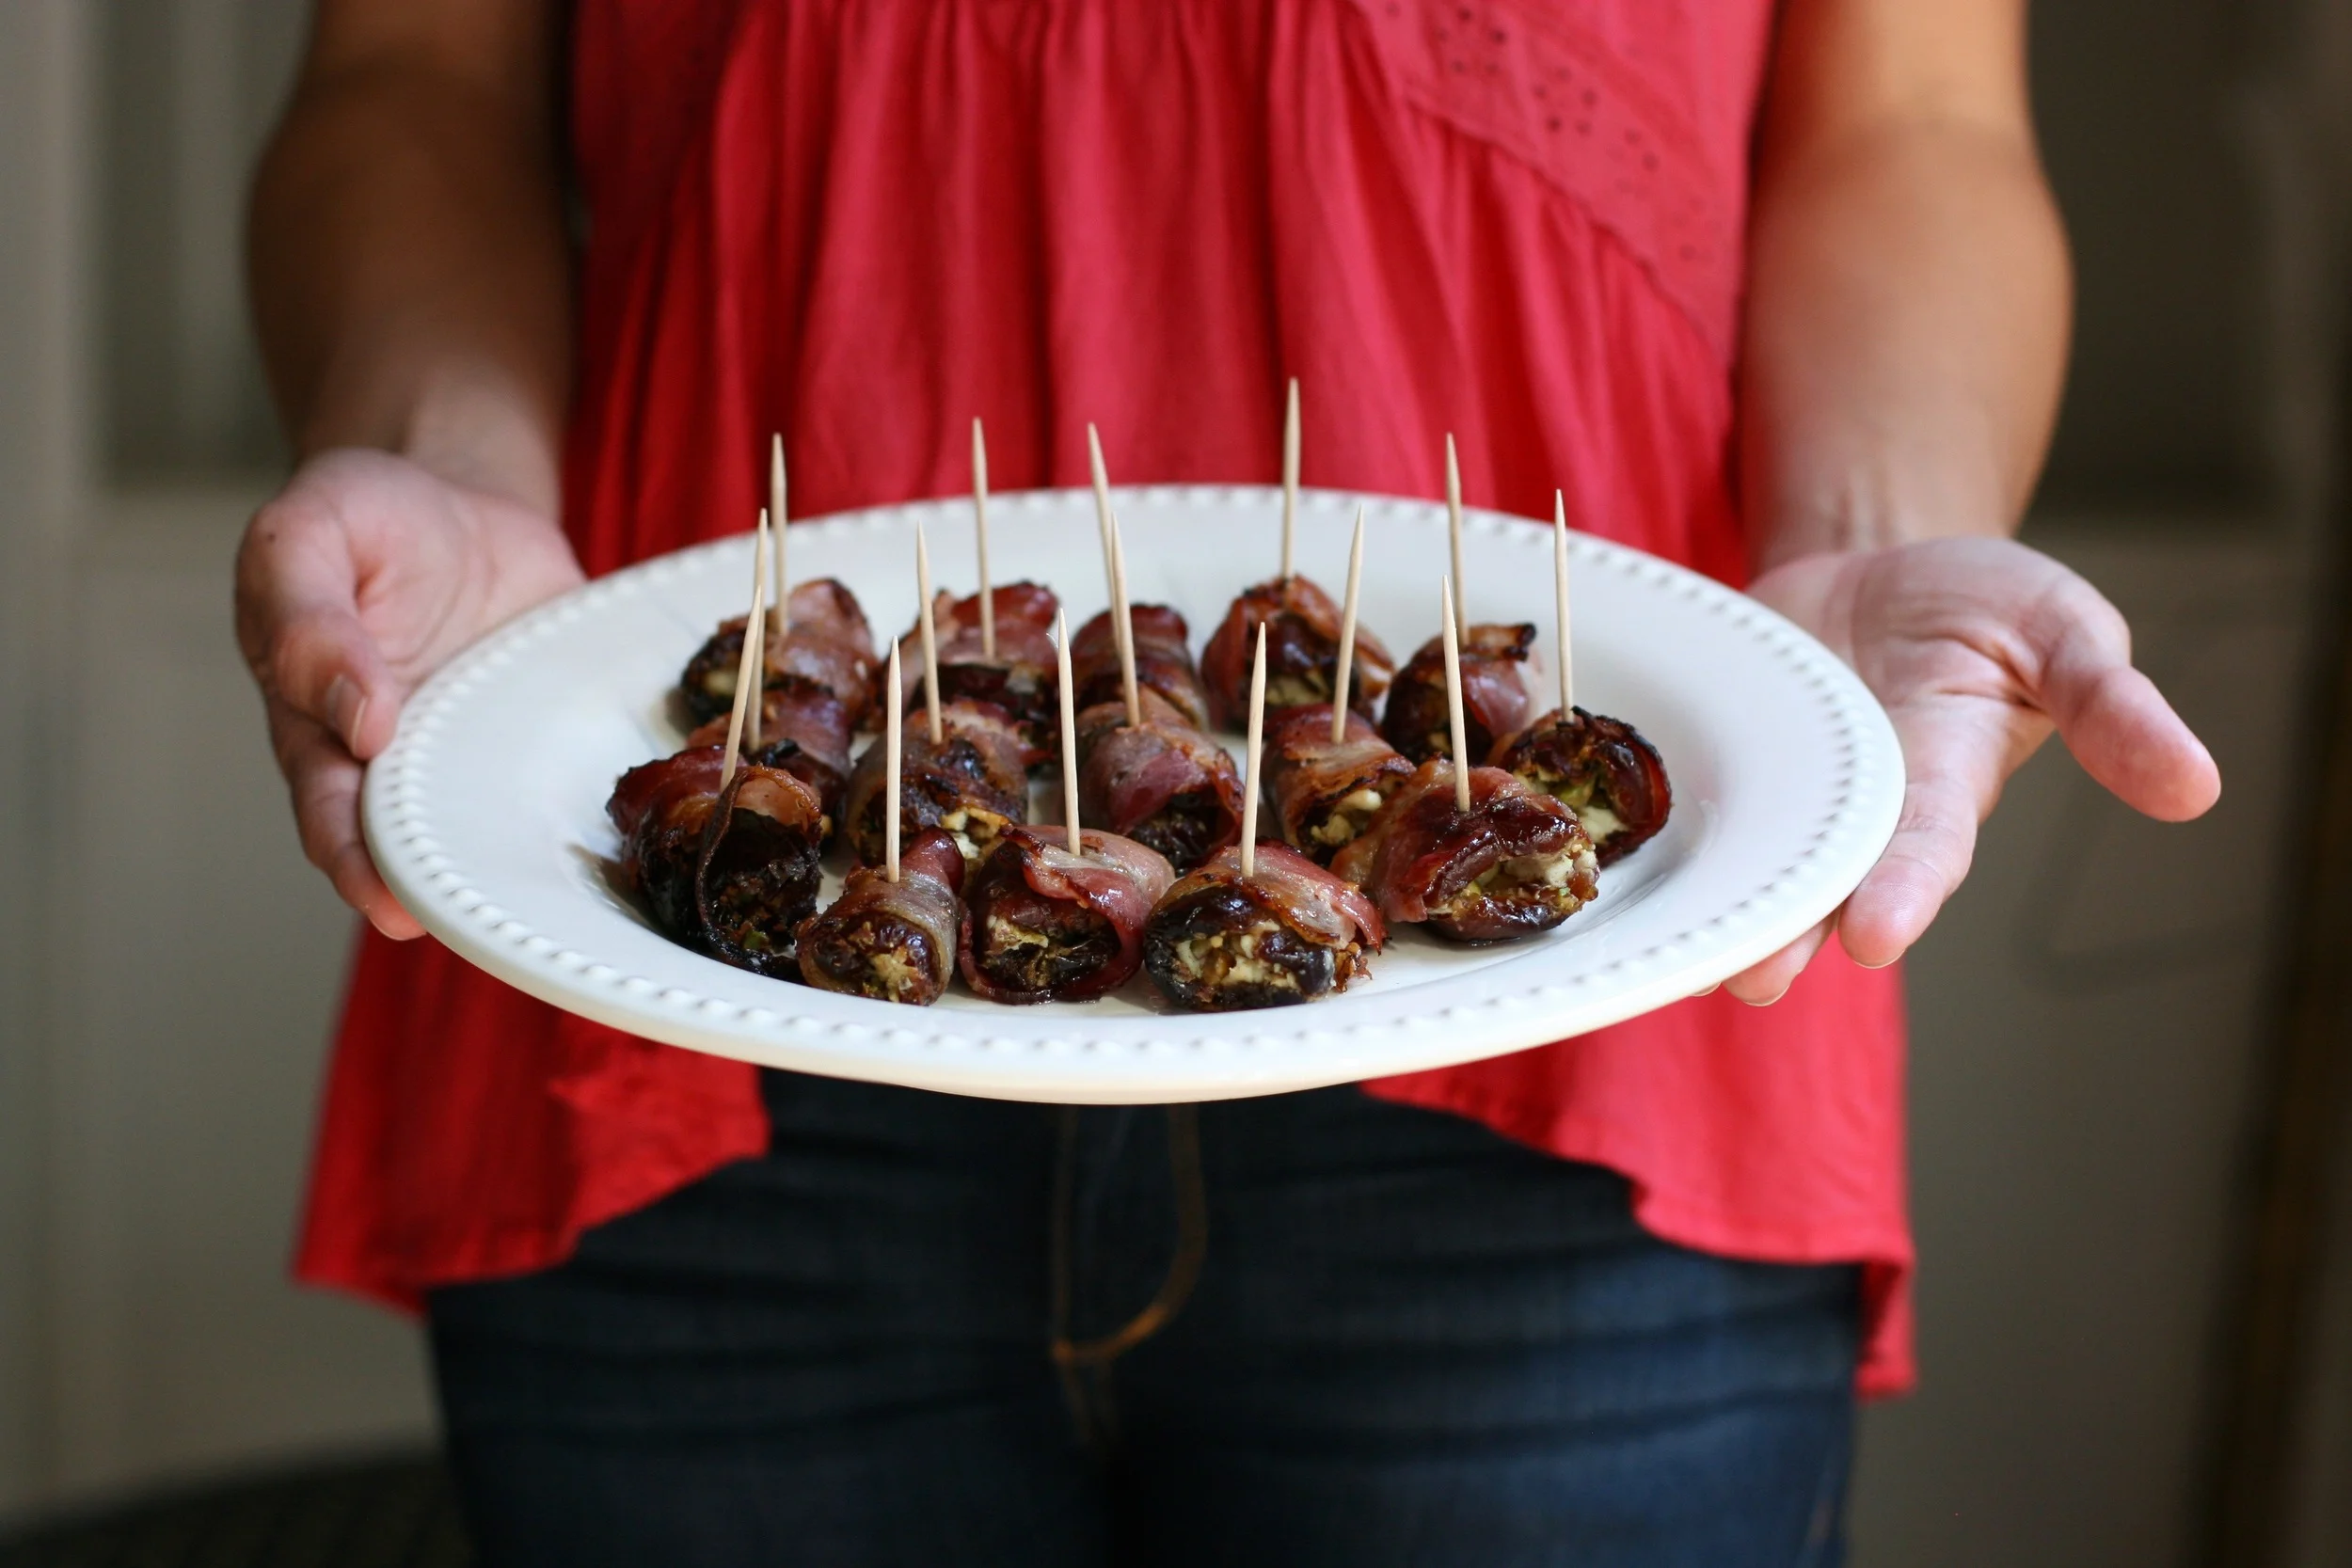
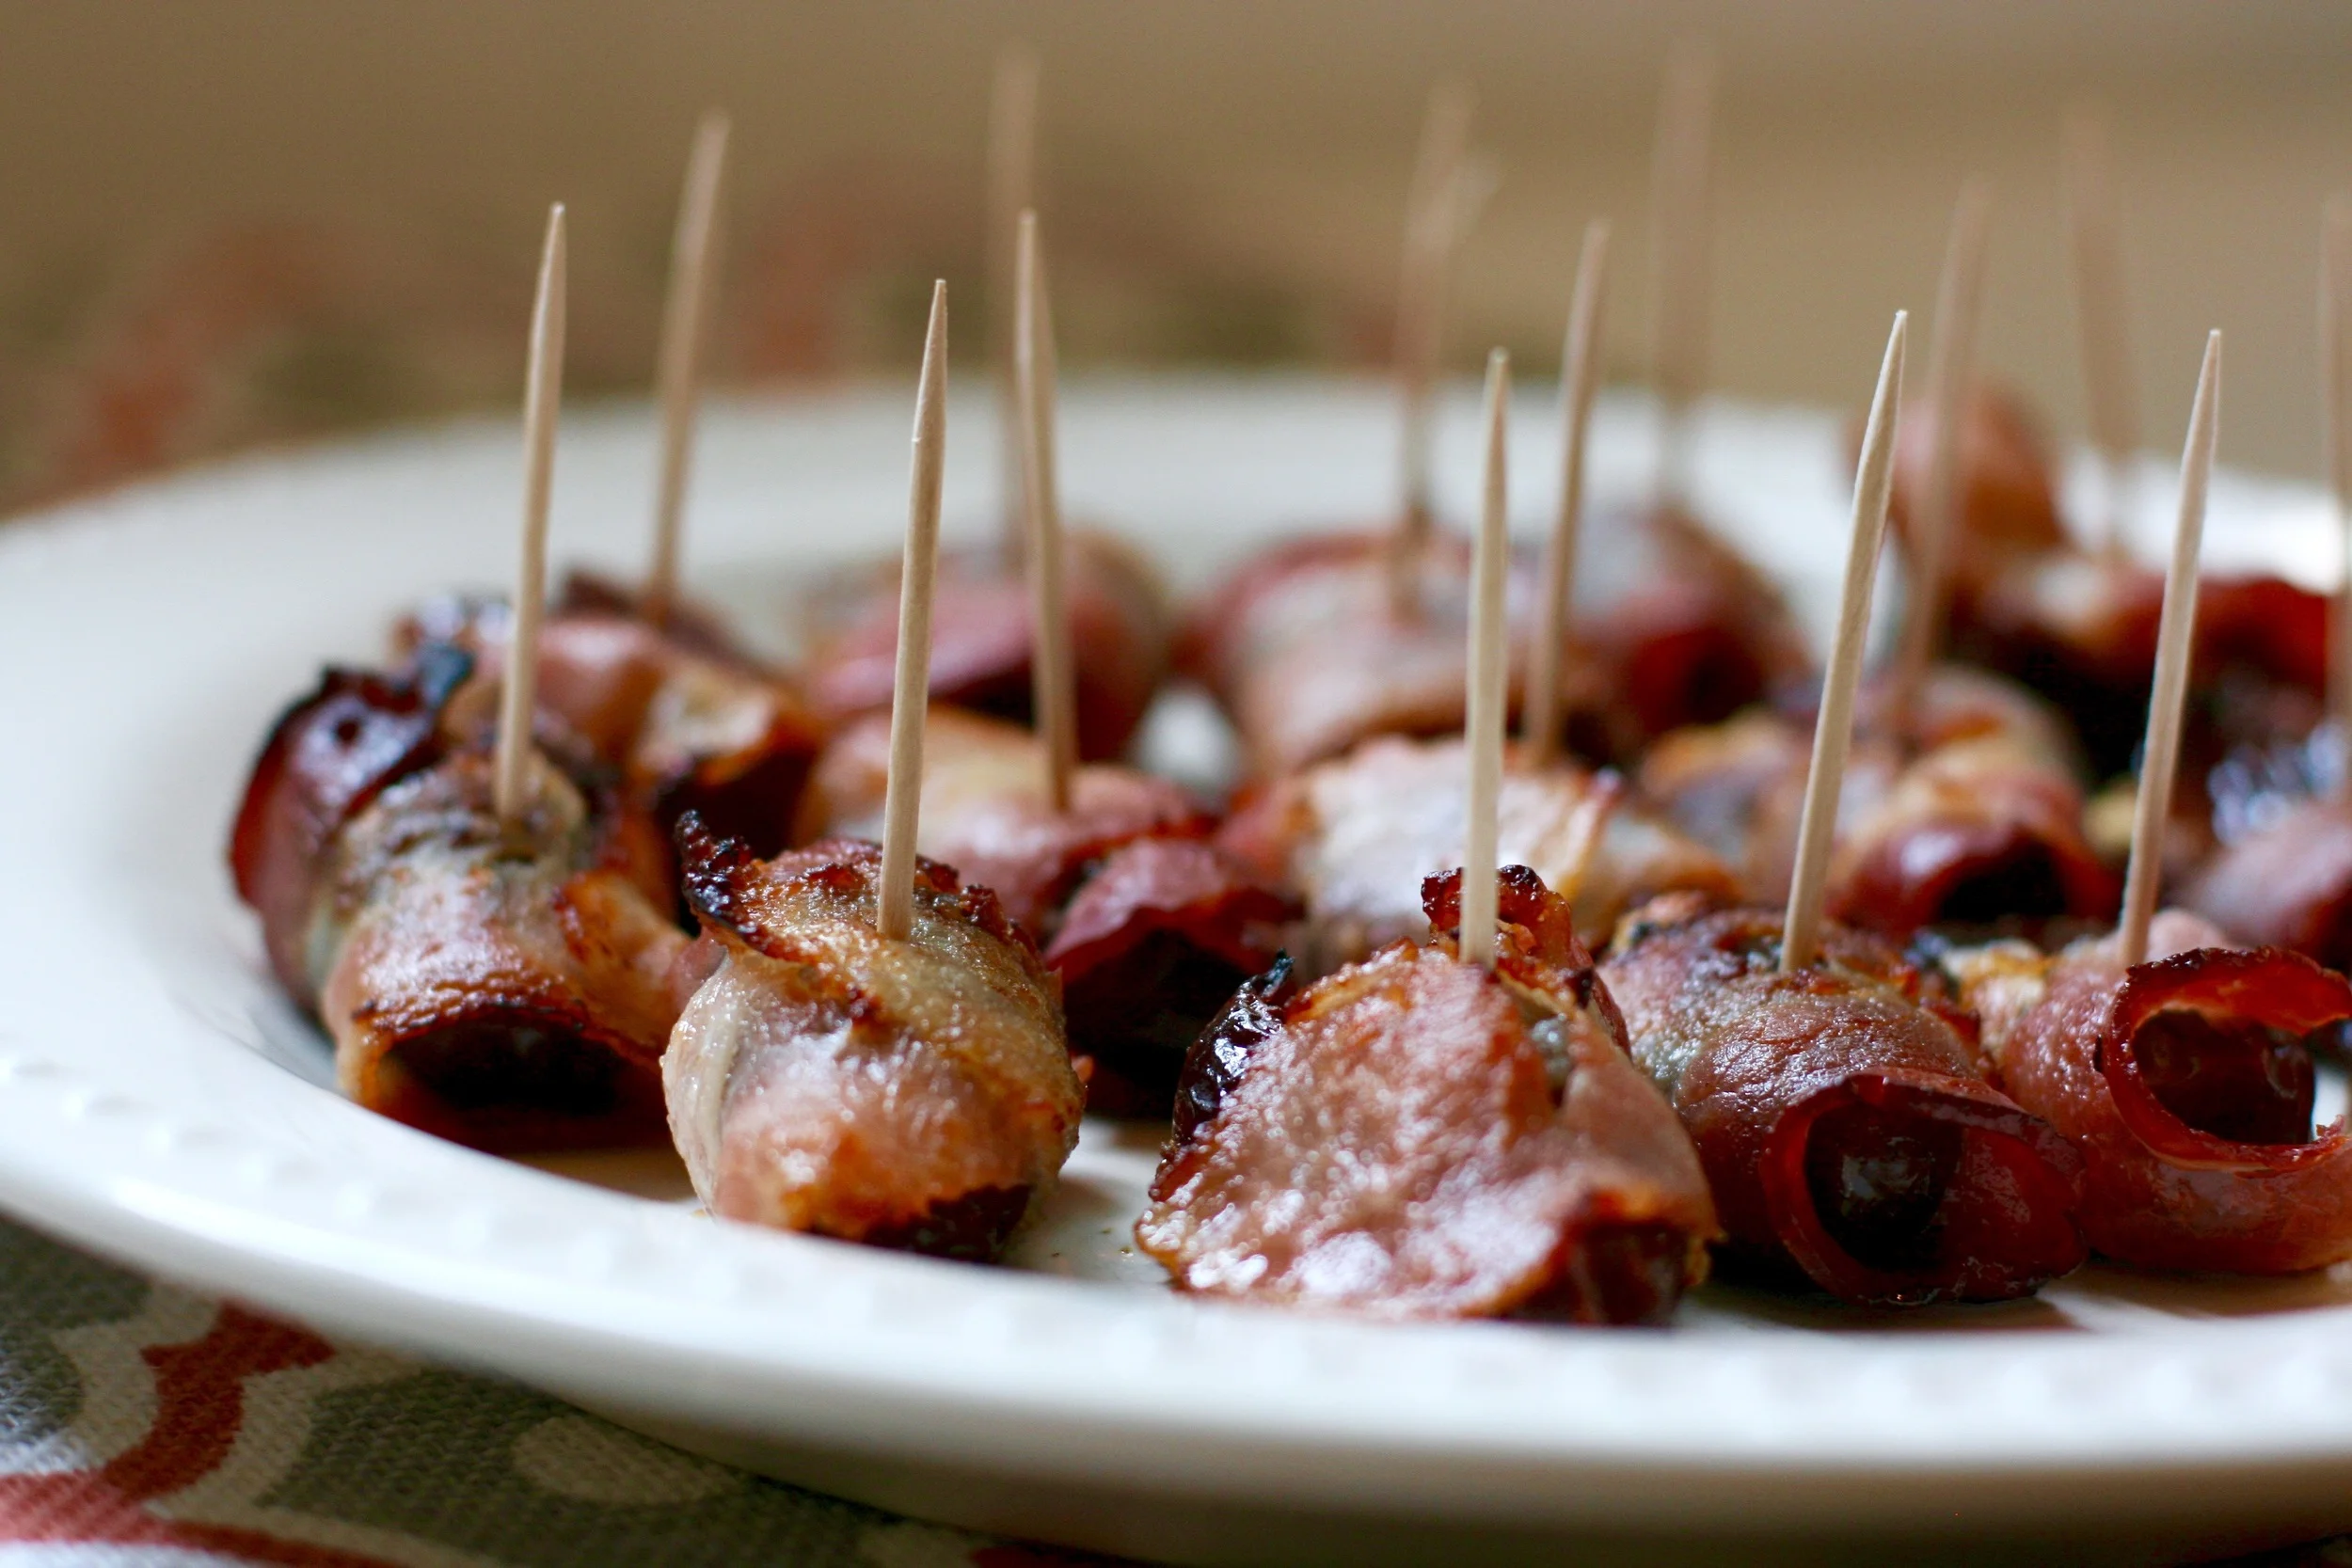
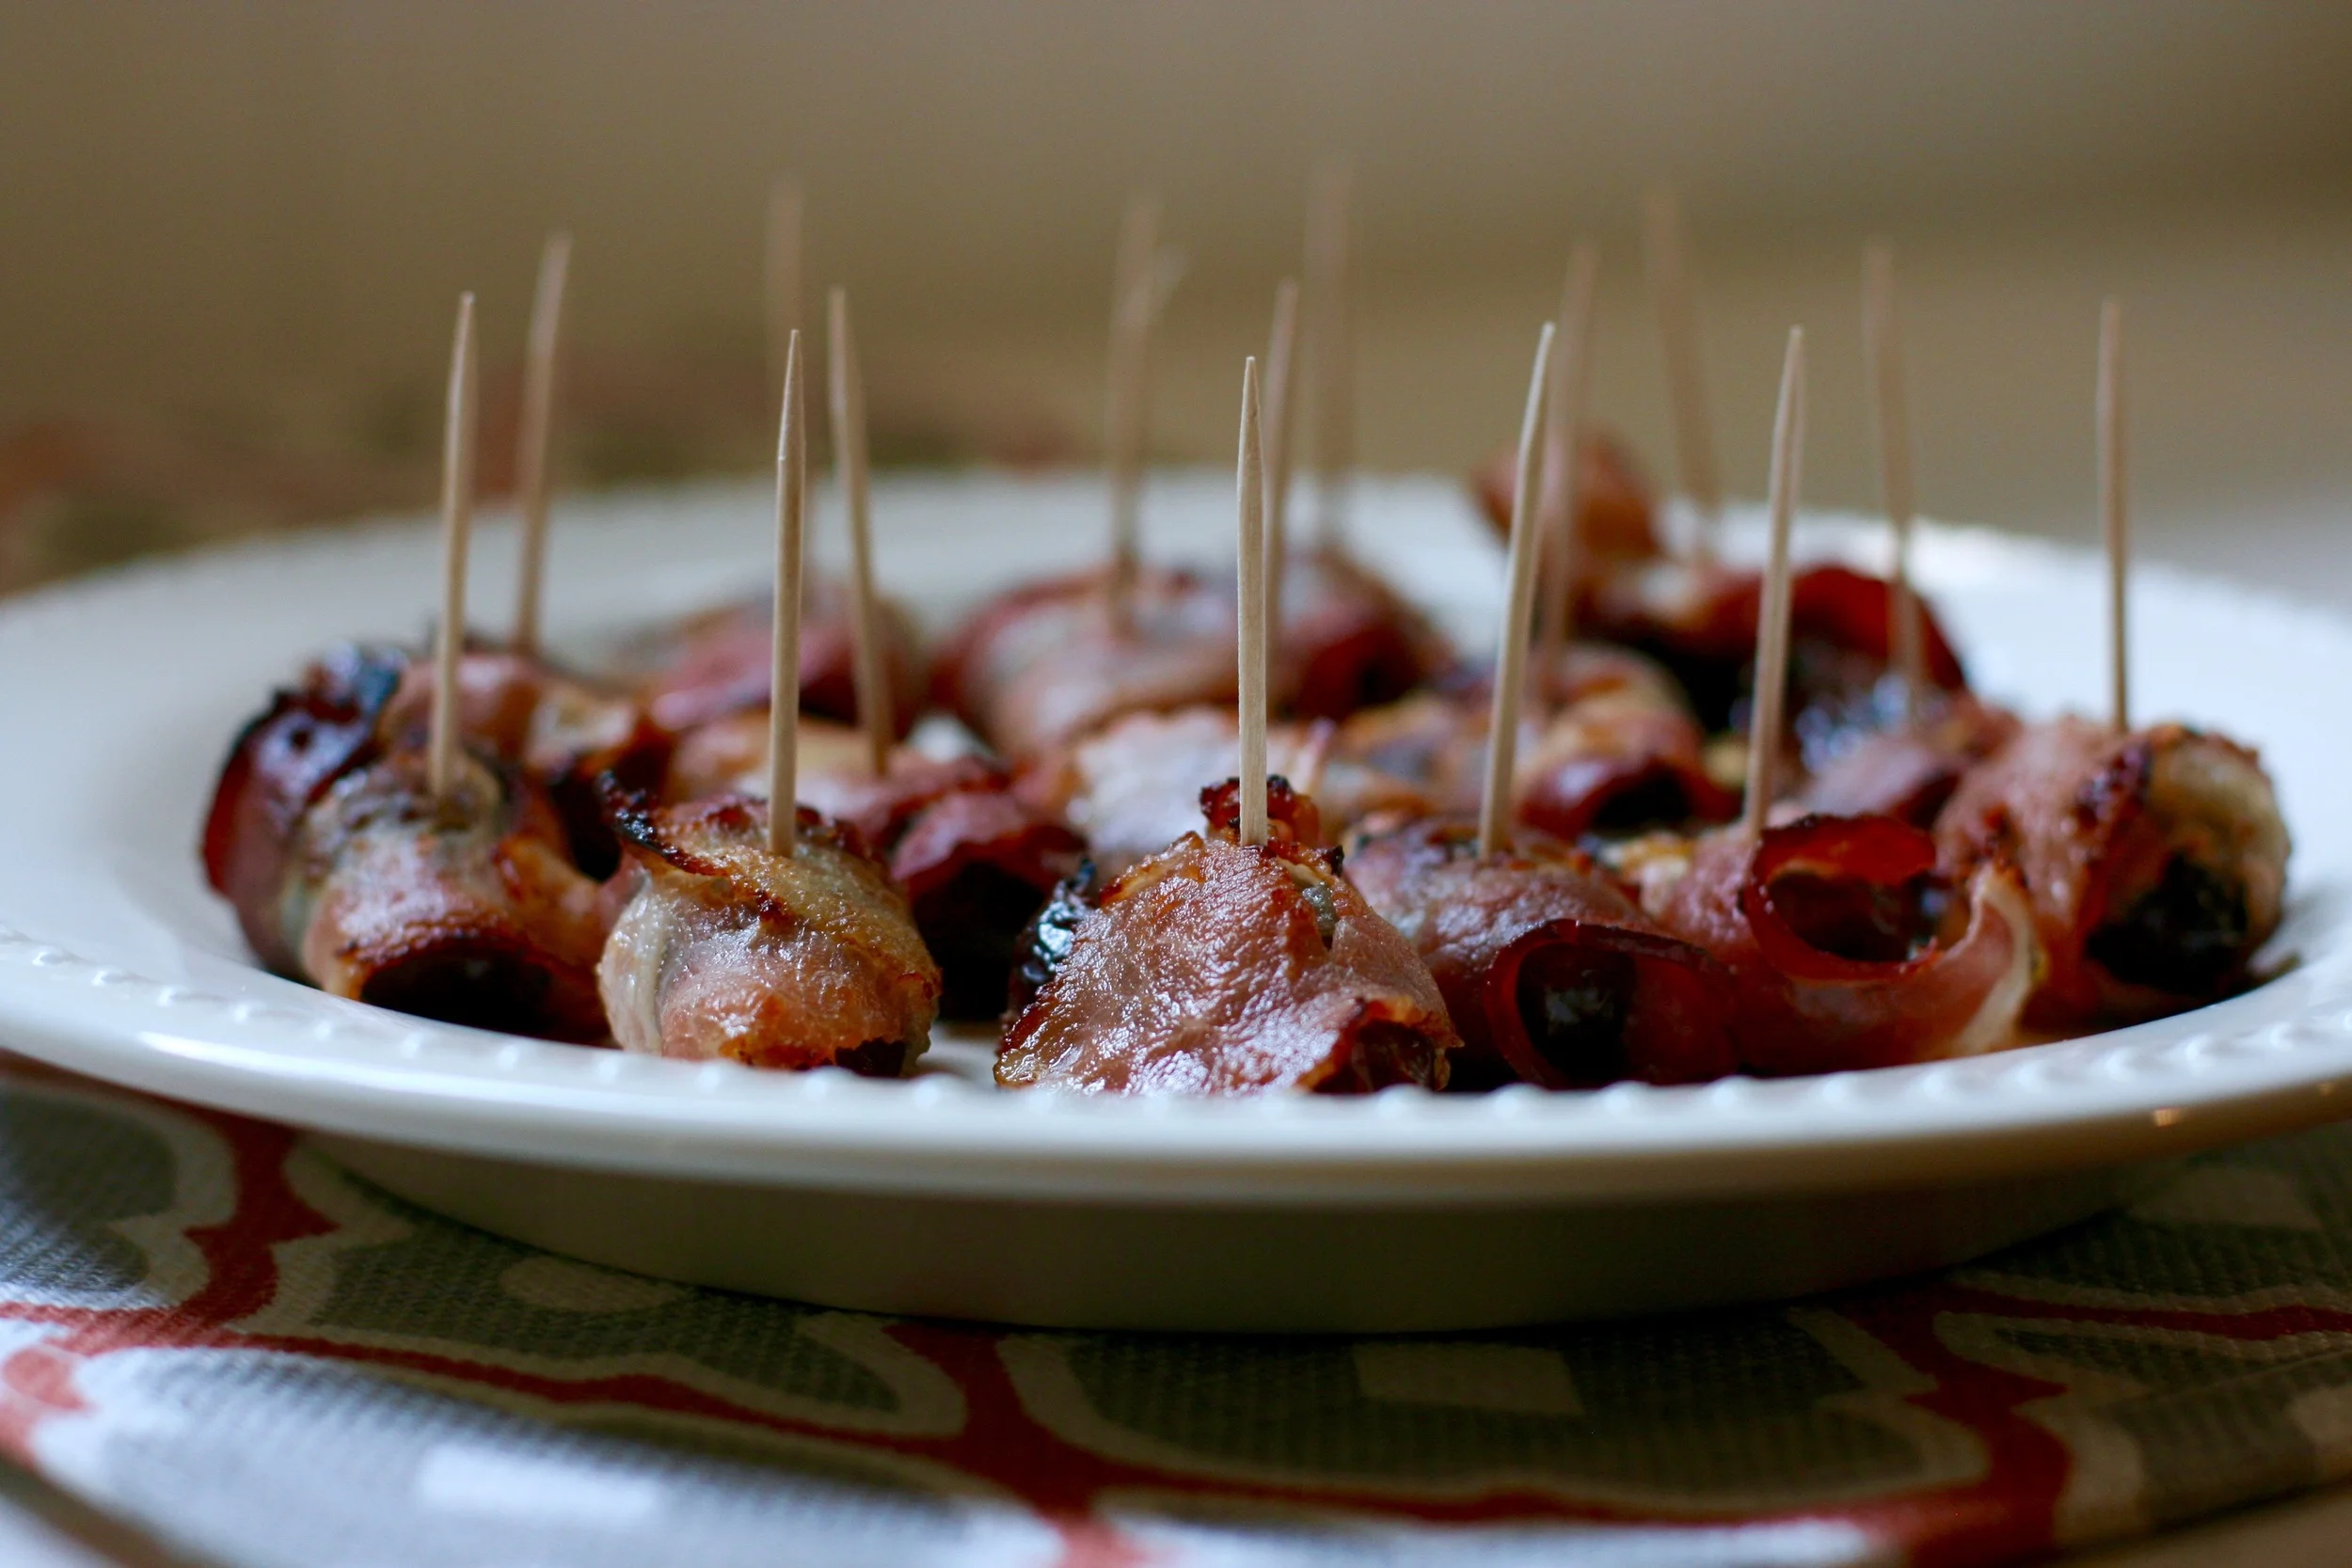
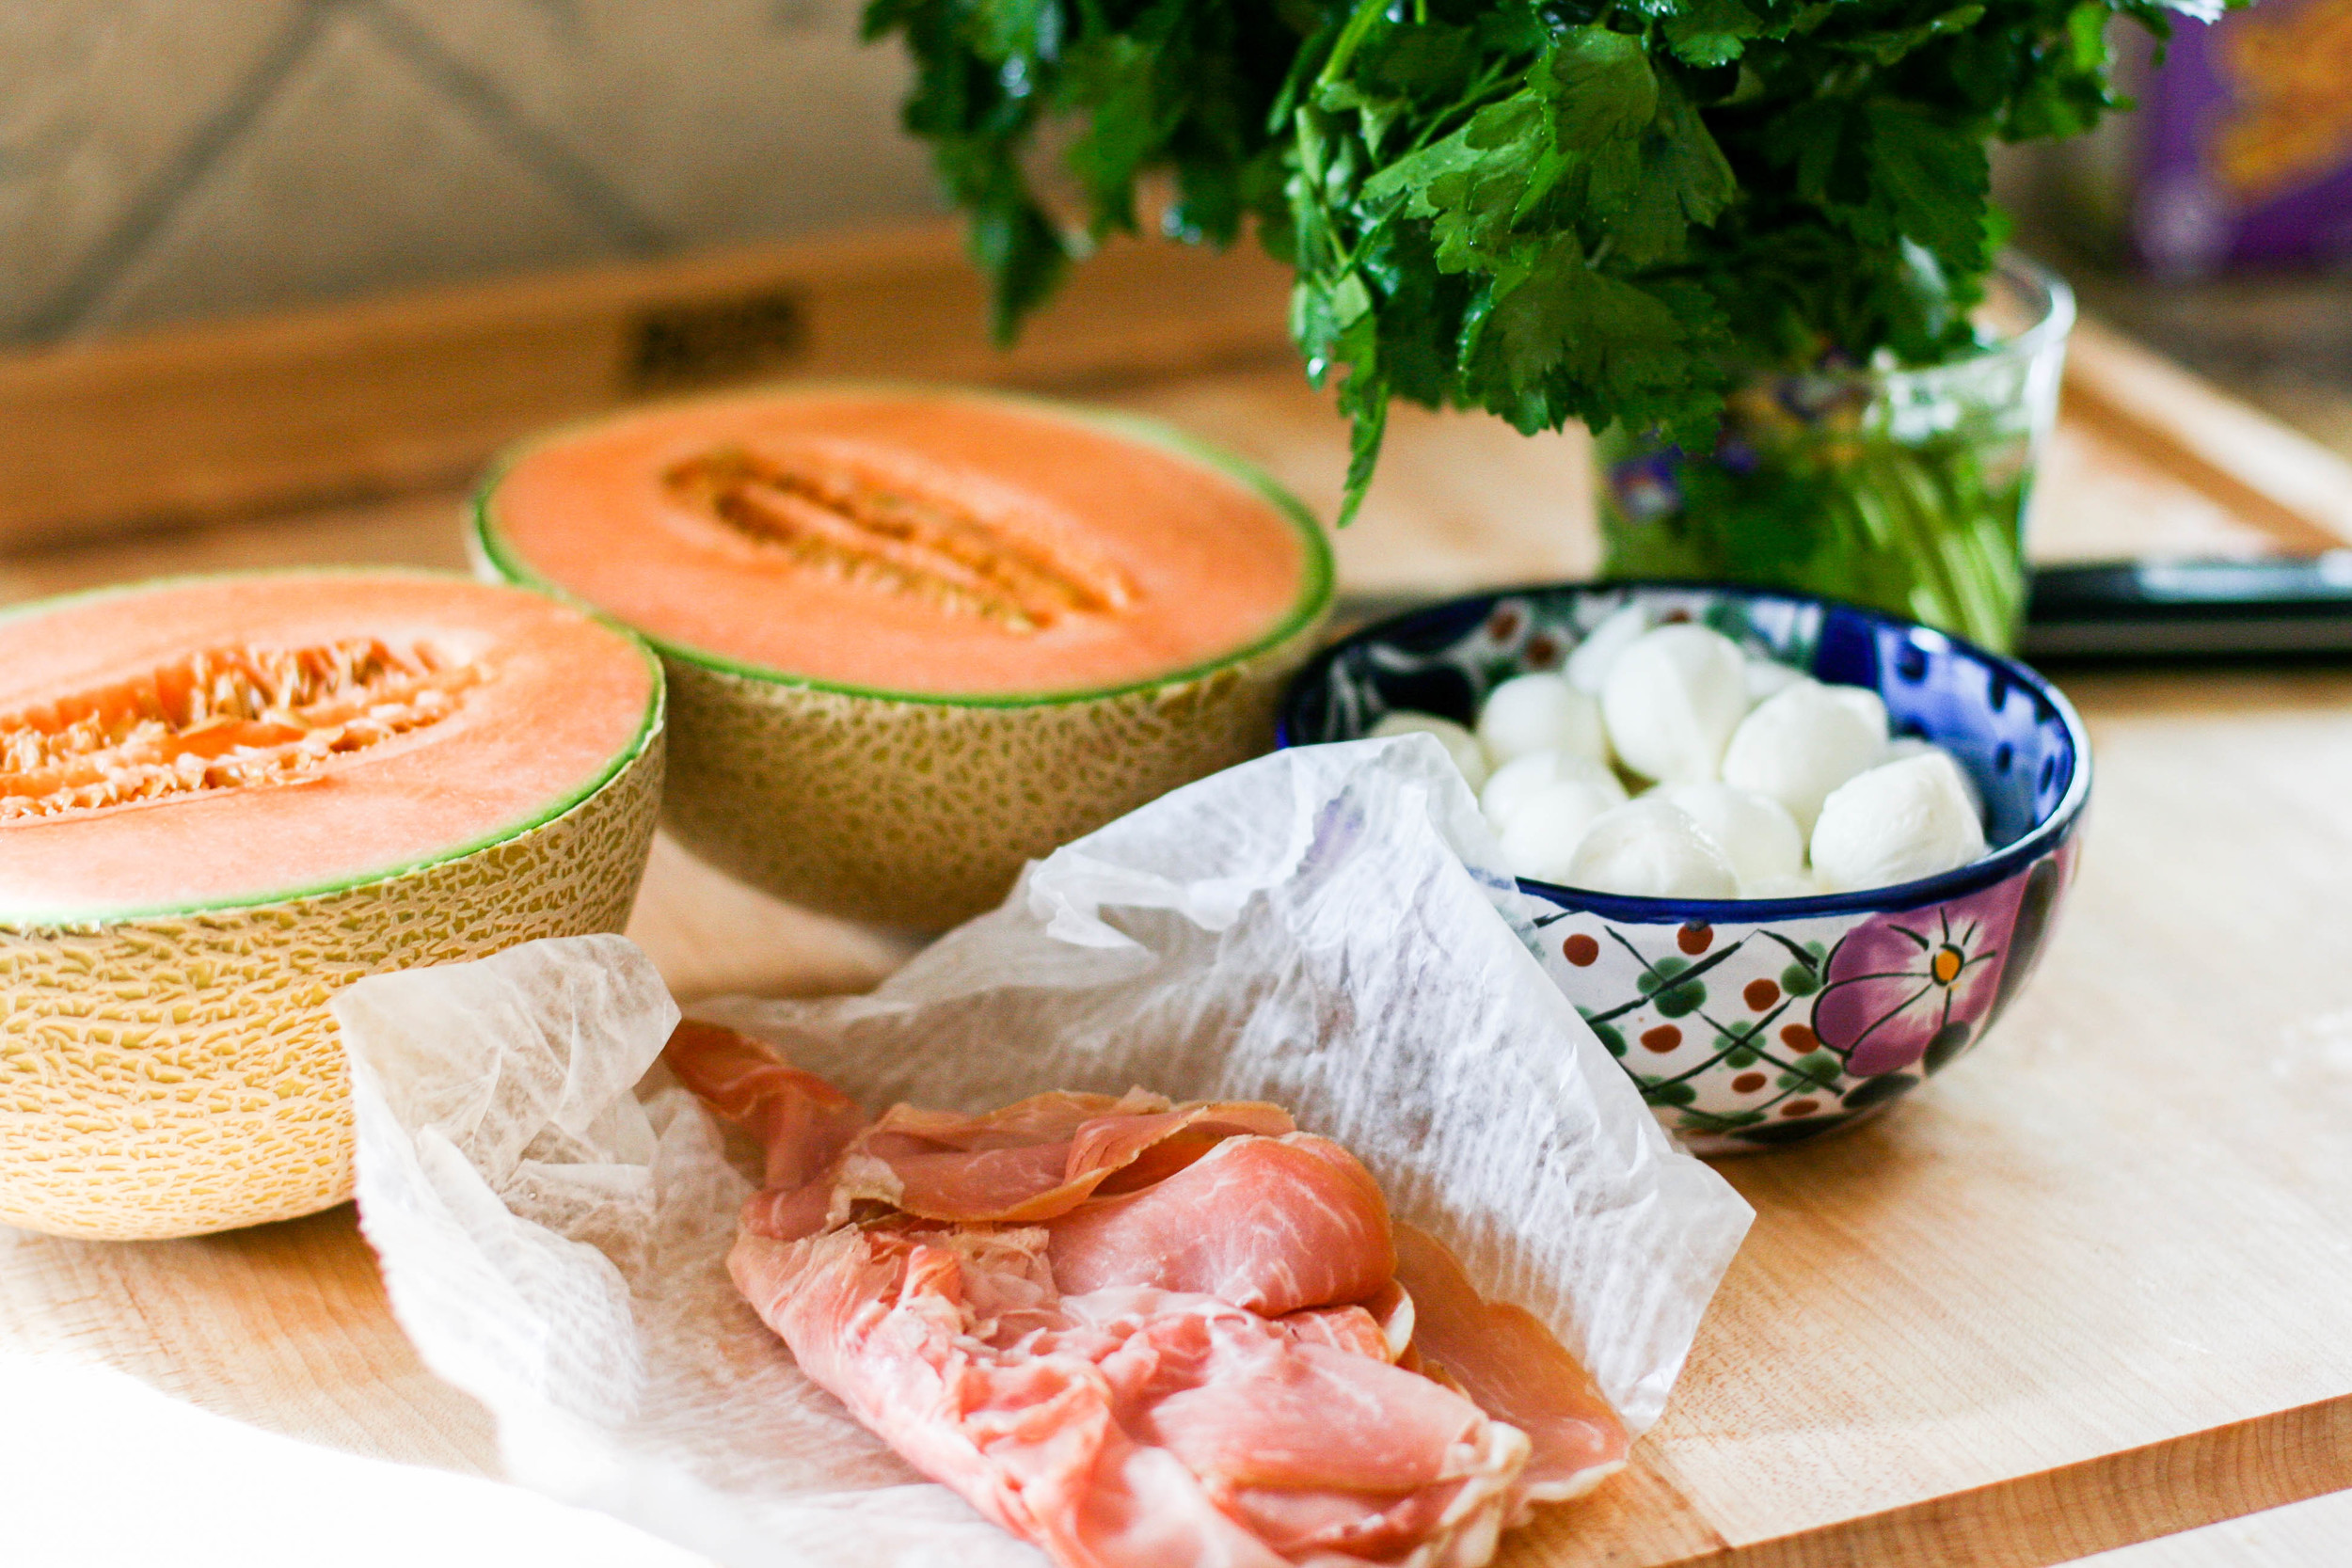
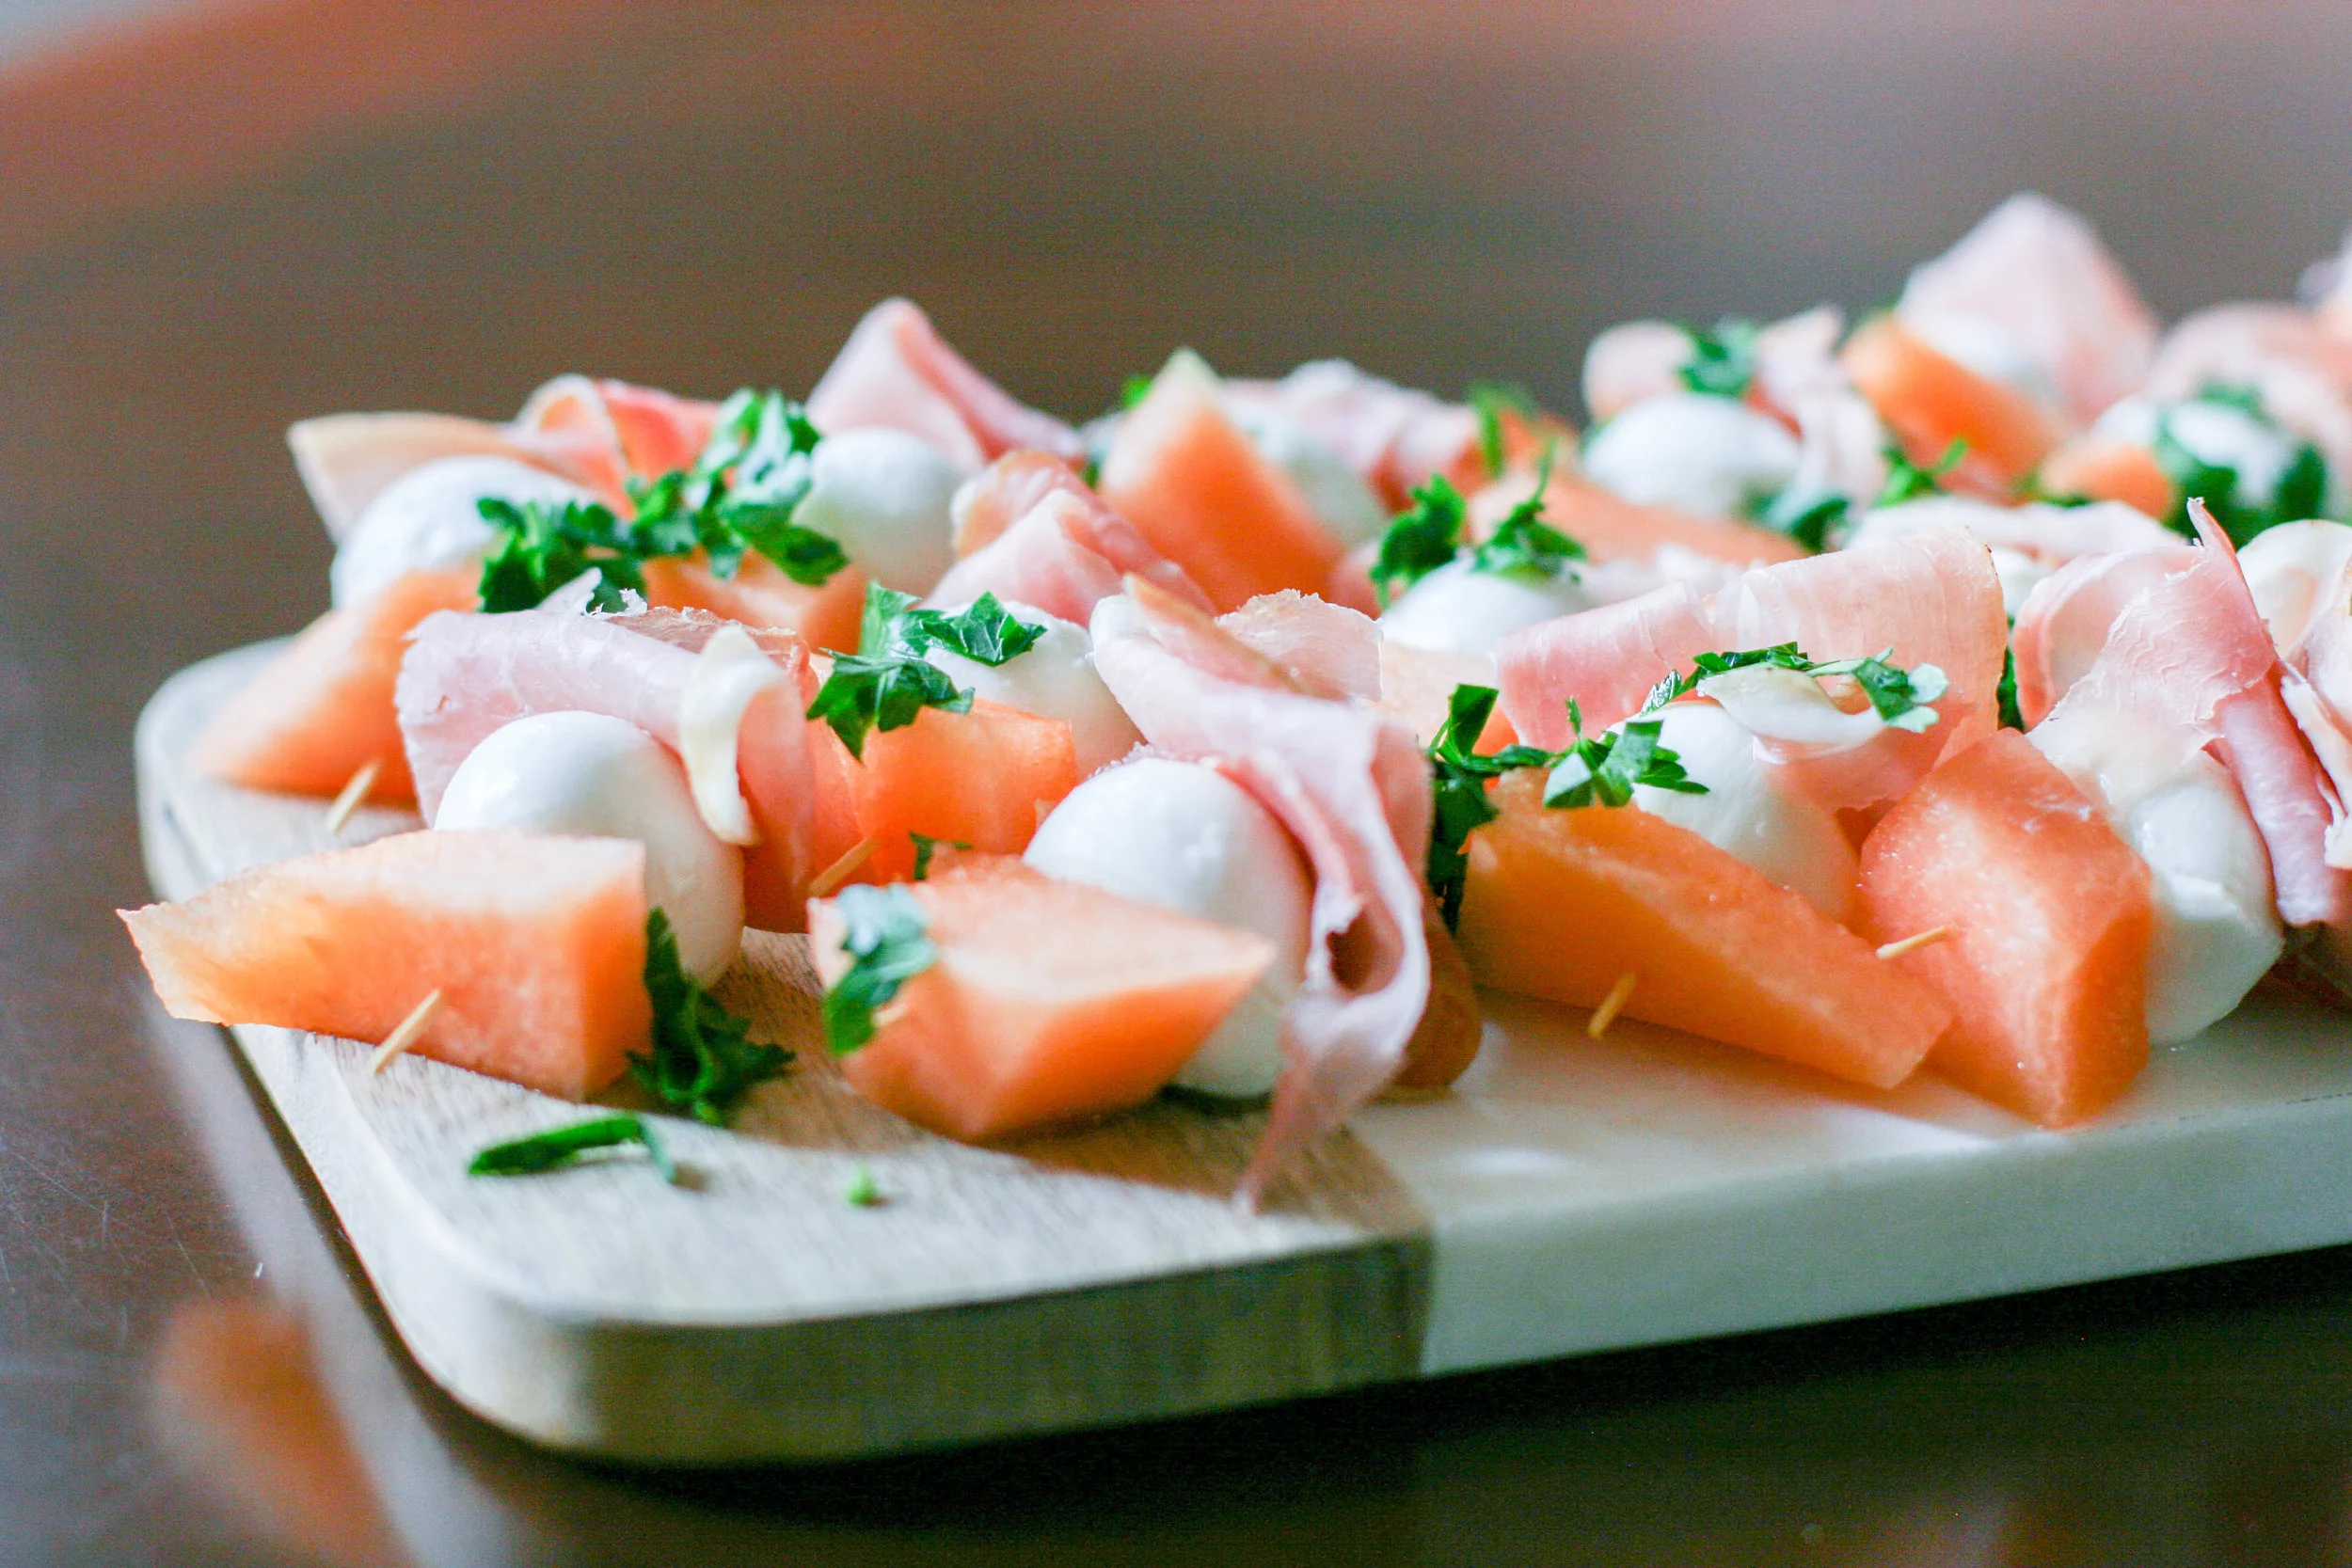
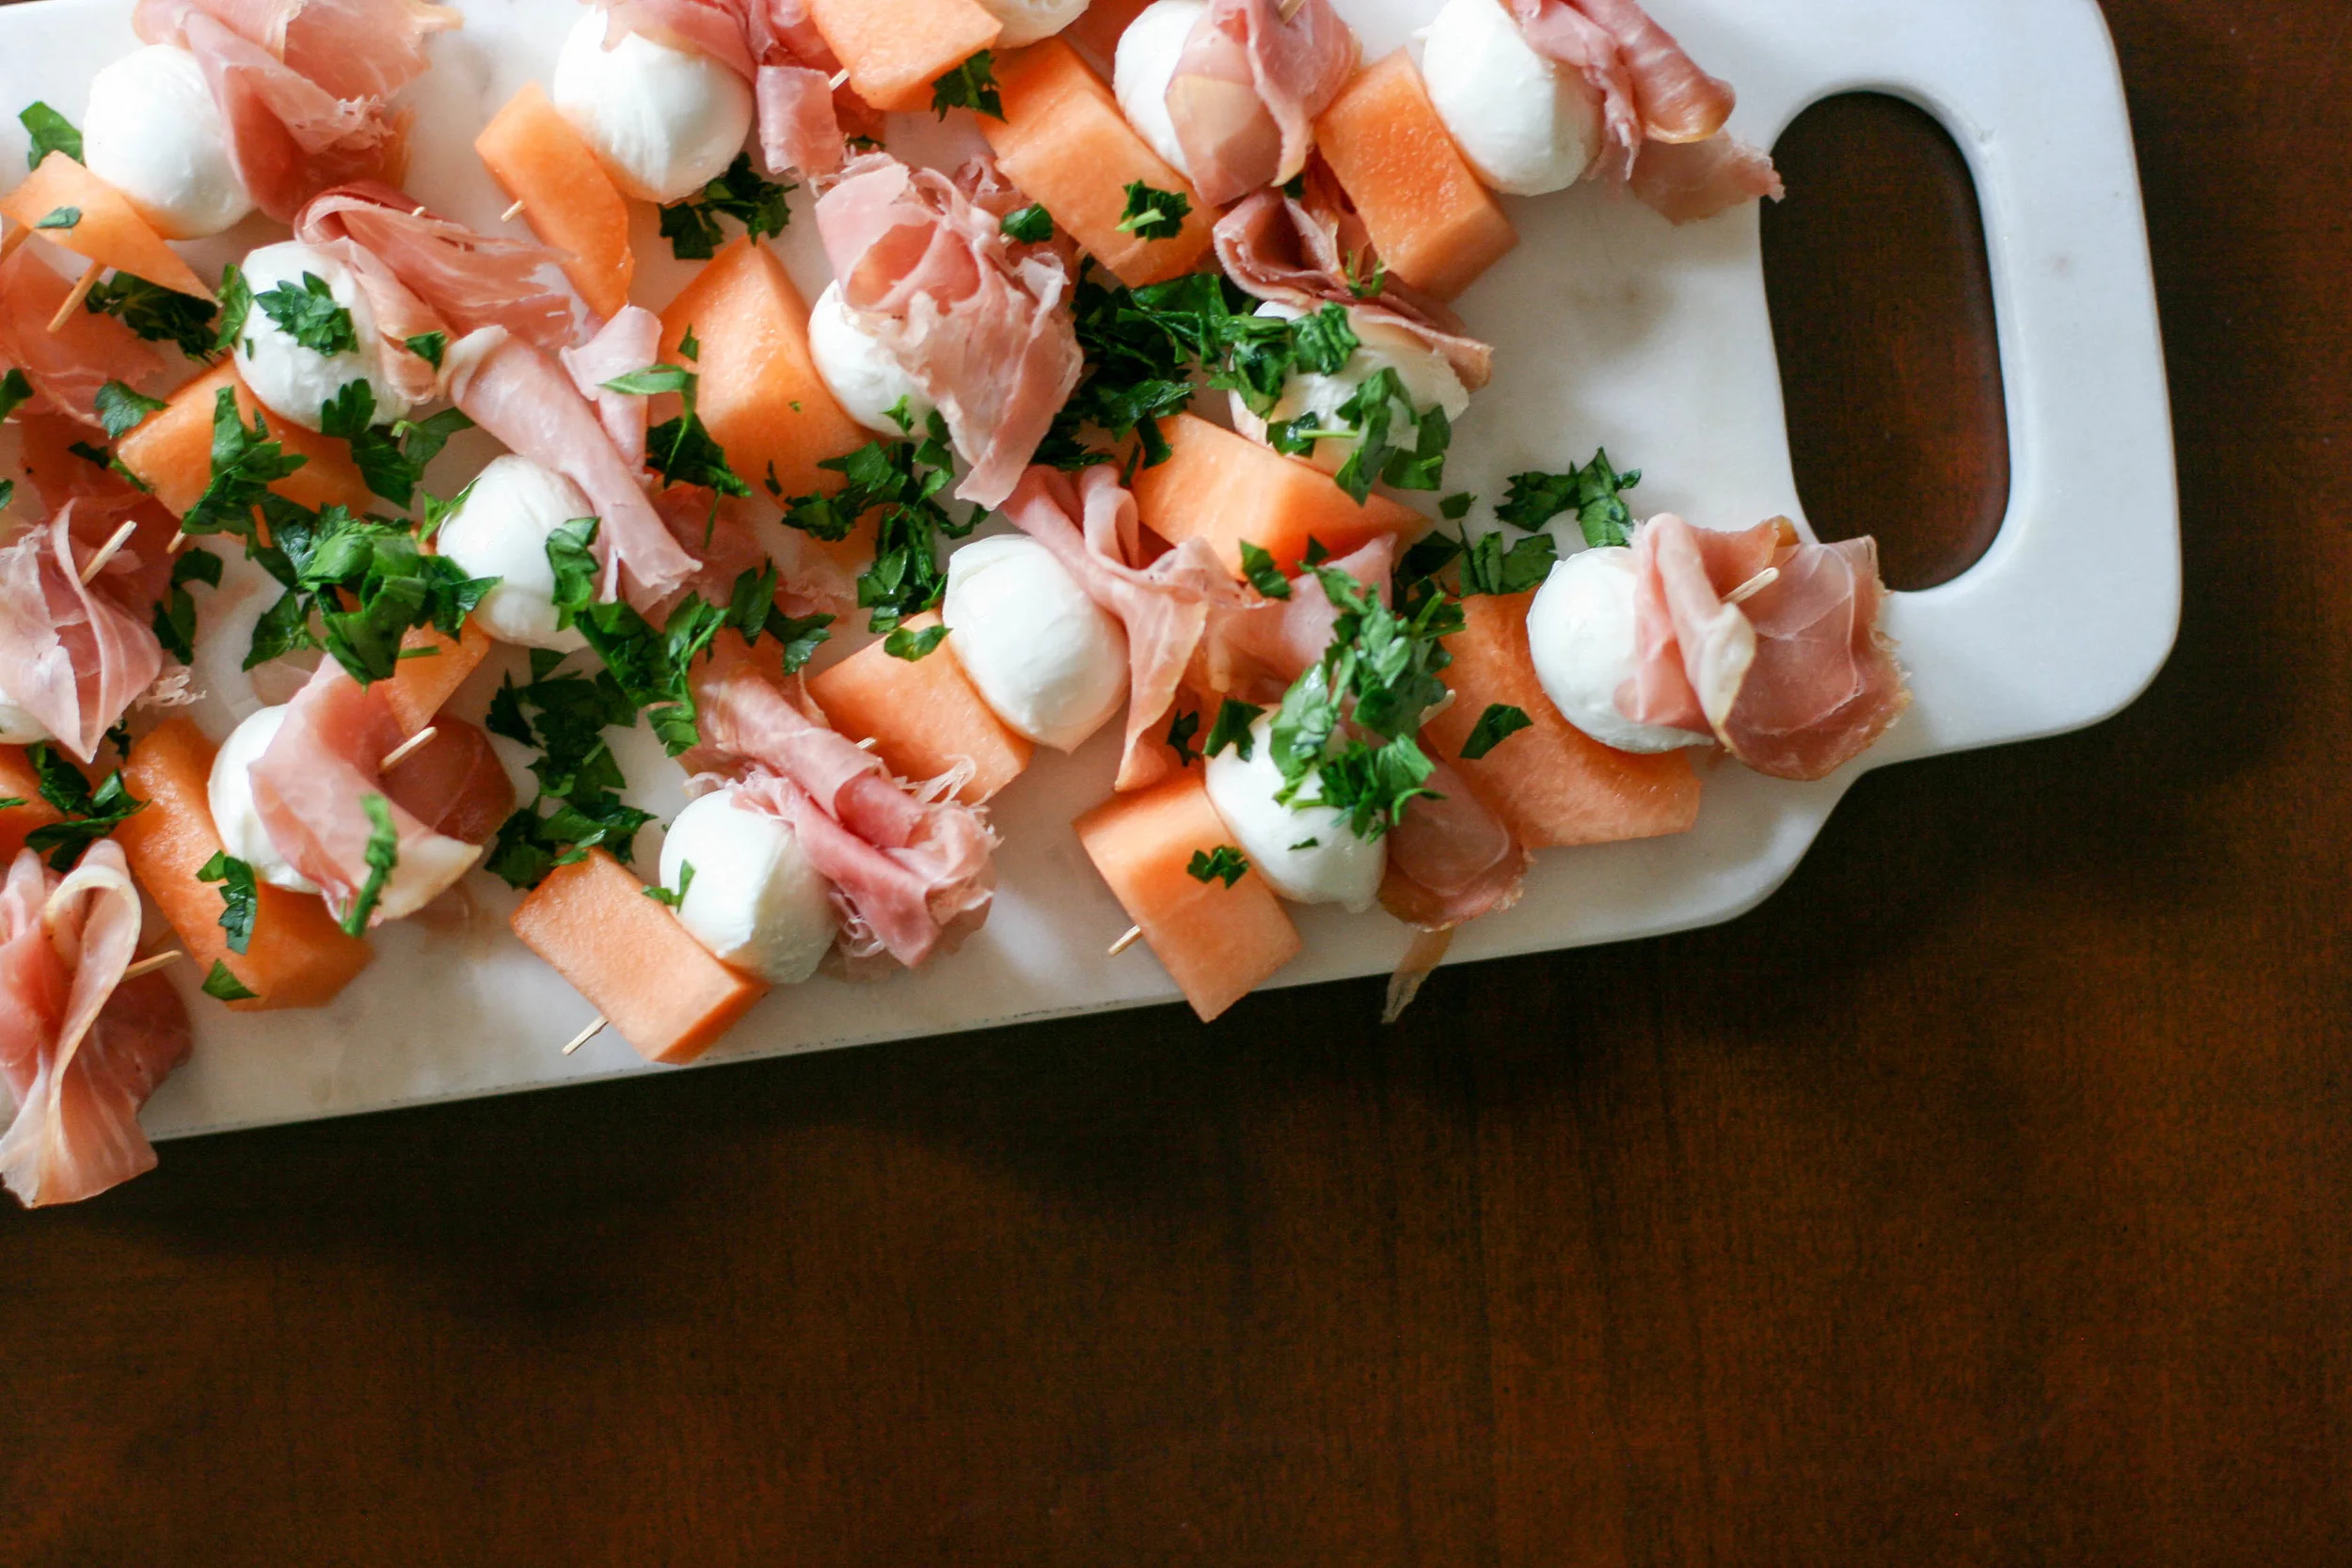
Prosciutto, Melon and Mozzarella Skewers.

Prosciutto, Melon and Mozzarella Skewer Small Bites

I love party food. Don't you? I make excuses to have people over just so I can try out new recipes and force feed my friends my latest experiments. Beware if you're invited over! Just kidding. I don't make bad food. Most of the time, anyway :)

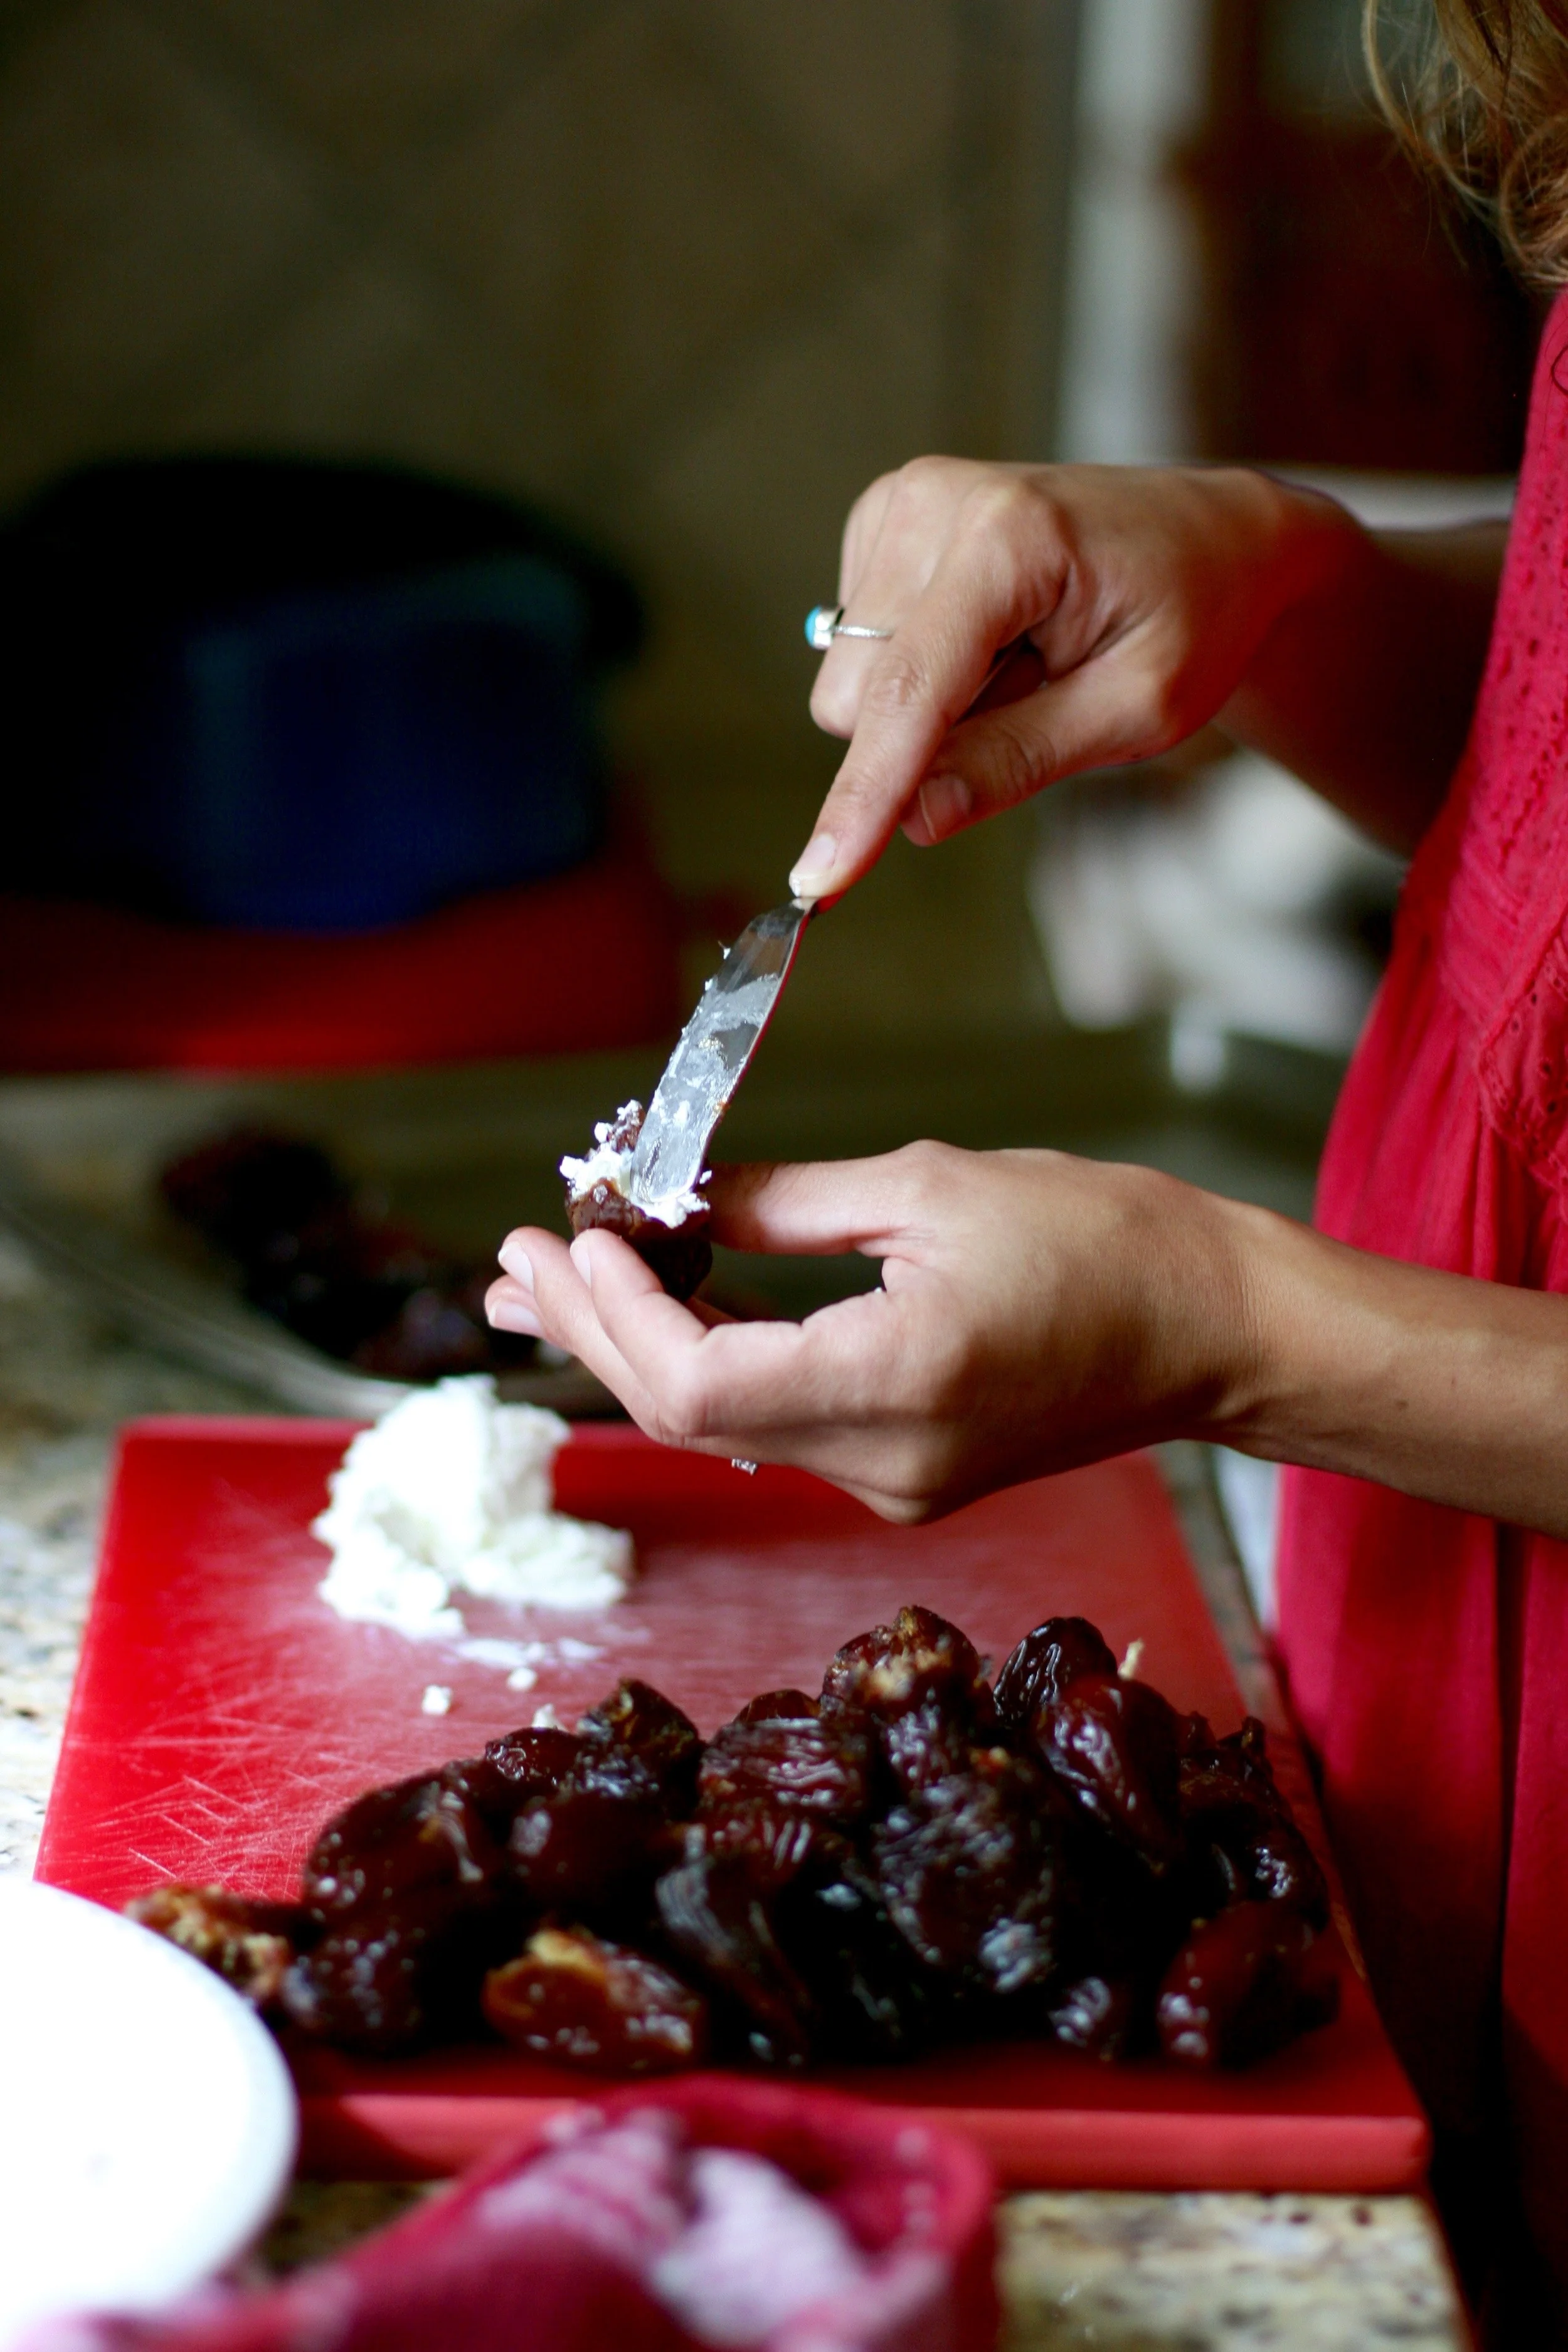
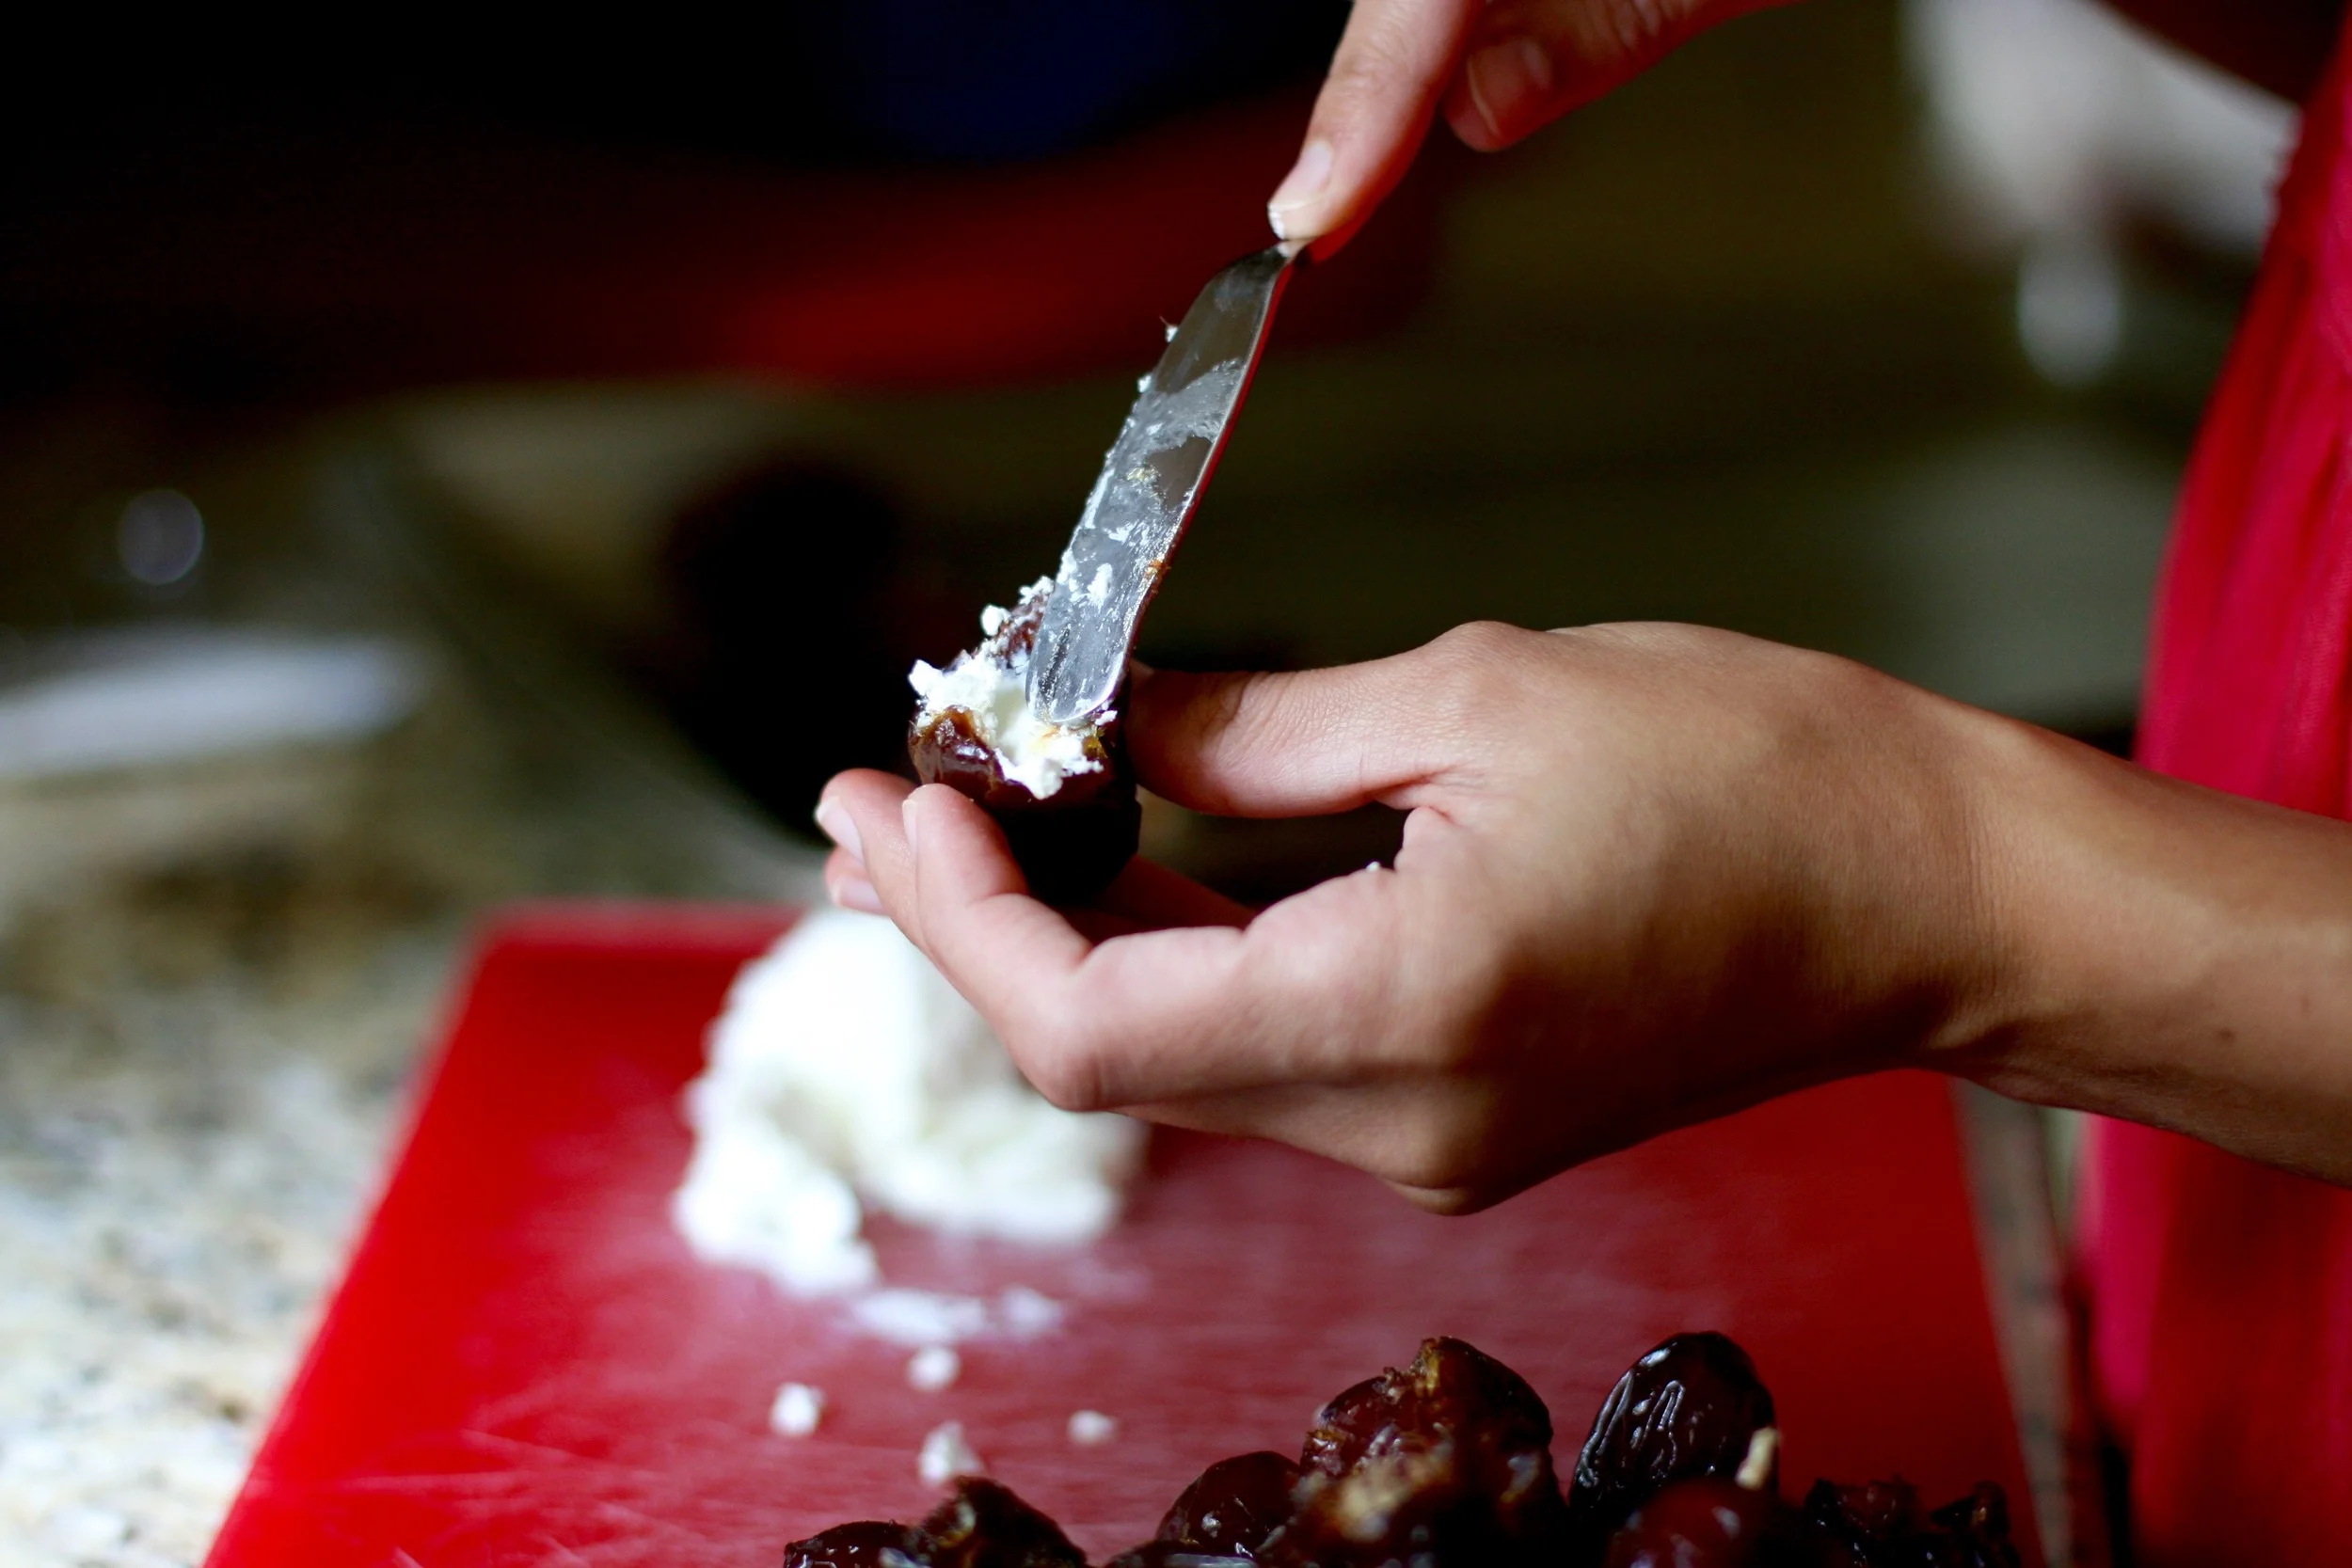
This was a fun little appetizer that I stumbled upon on Pinterest via The Comfort of Cooking, and I thought I would give it a try for my Dave Ramsey FPU small group's last meeting. It was a fresh, Spring-y appetizer that excellently combined the sweet melon flavor with the salty prosciutto, sandwiching the creamy mozzarella and earthy parsley. It was really the right combination of flavors in one small bite. As I was munching on a few of these, I began brainstorming, and I think this appetizer would be delicious if you subbed the cantaloupe for mango or even pineapple. It would add an even wider range of flavors, which is just pure fun.

So if you have a party coming up, you should definitely give this one a try. It is no-cook, no-bake and took me under 15 minutes to prep. In other words, it's the world's perfect appetizer.
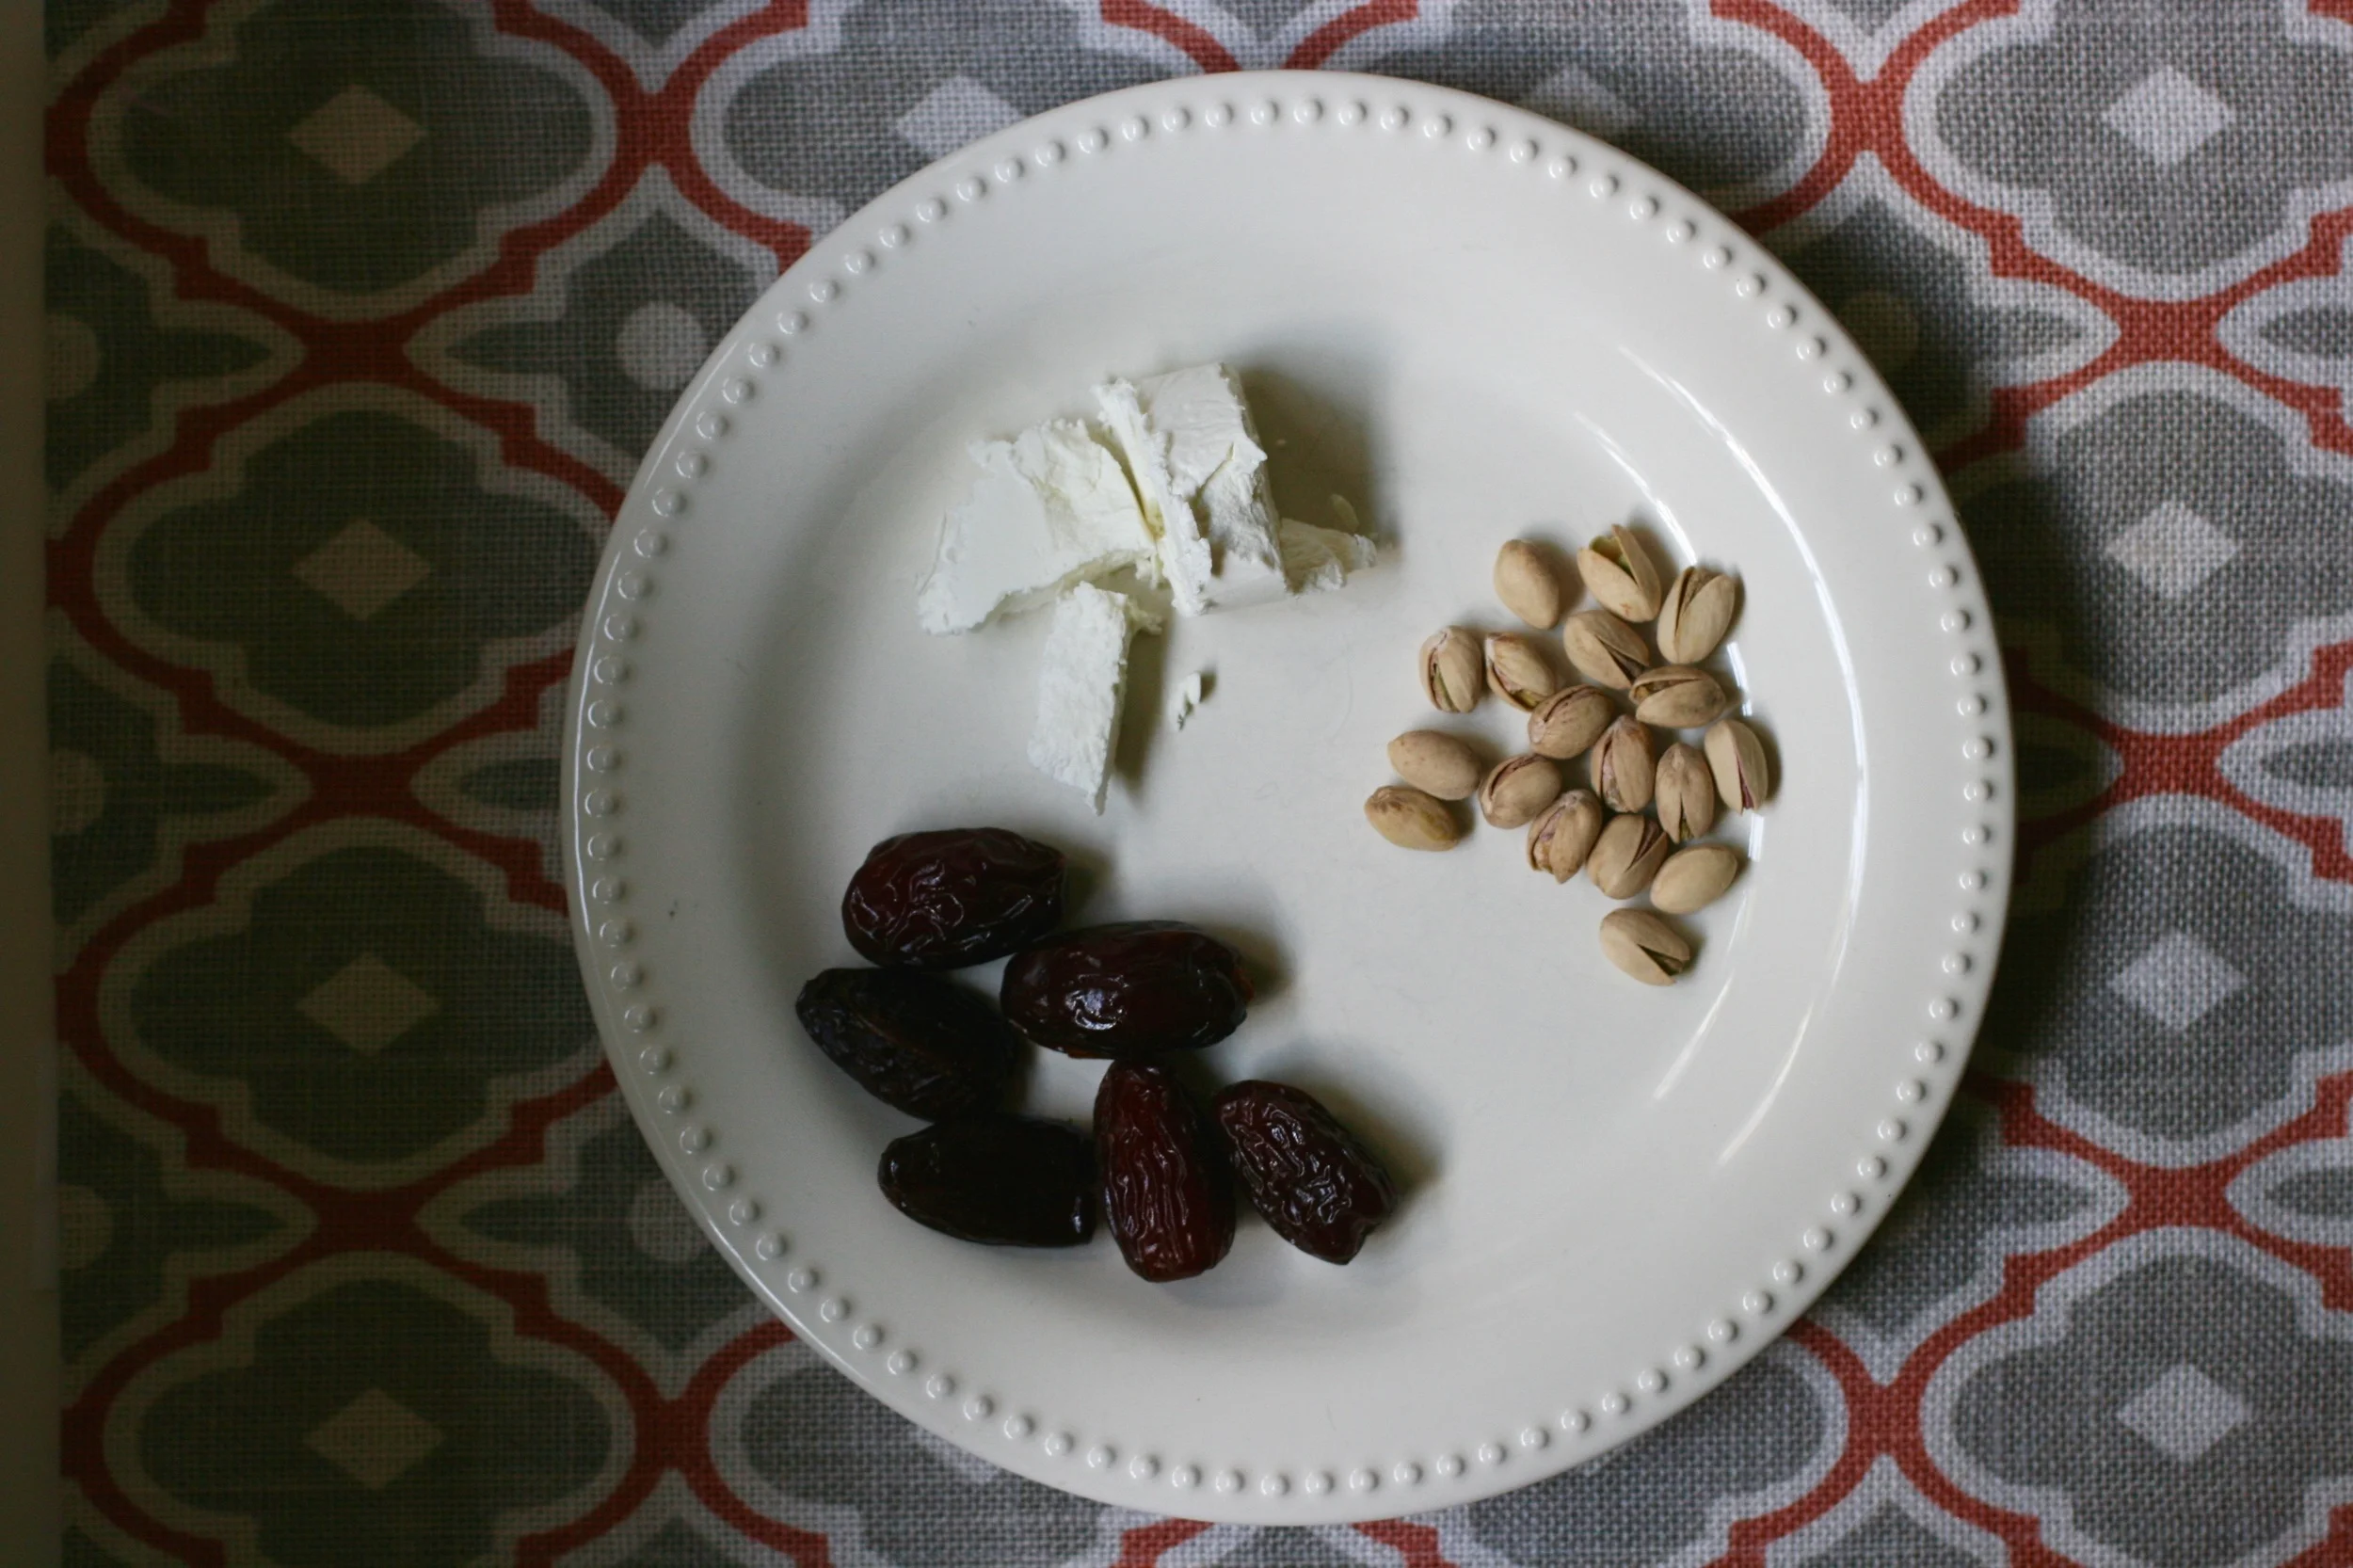
Ingredients:
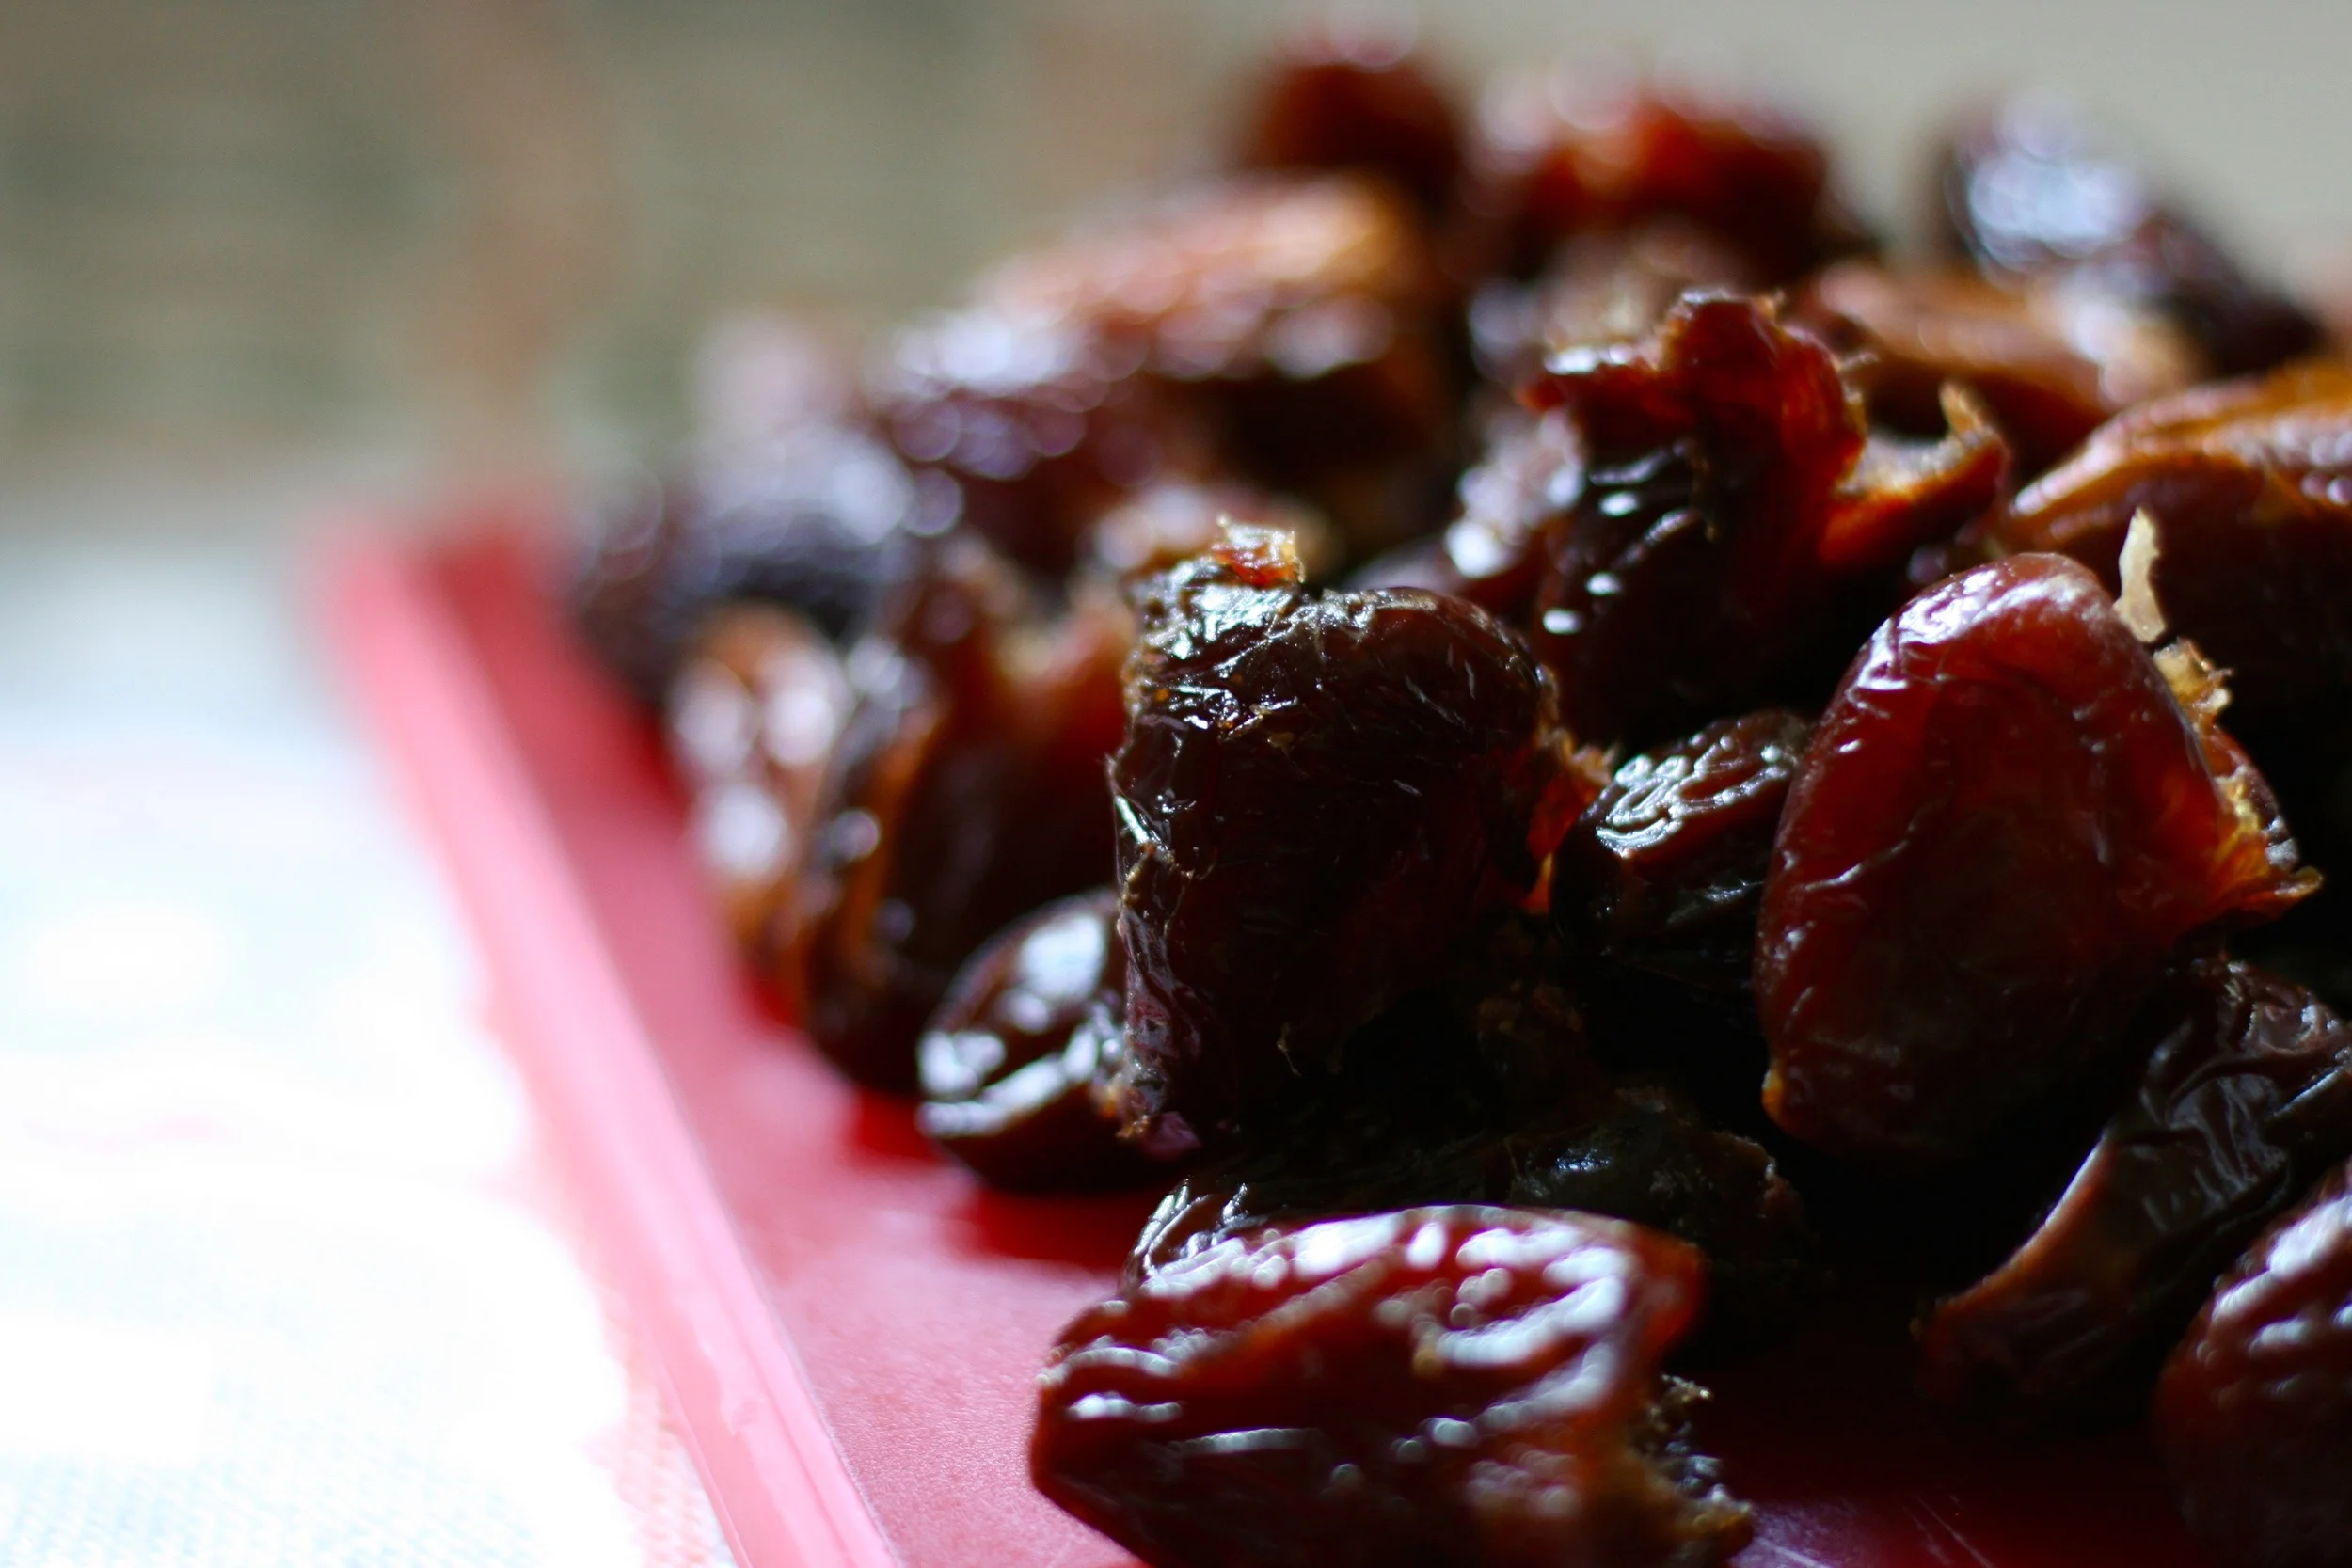
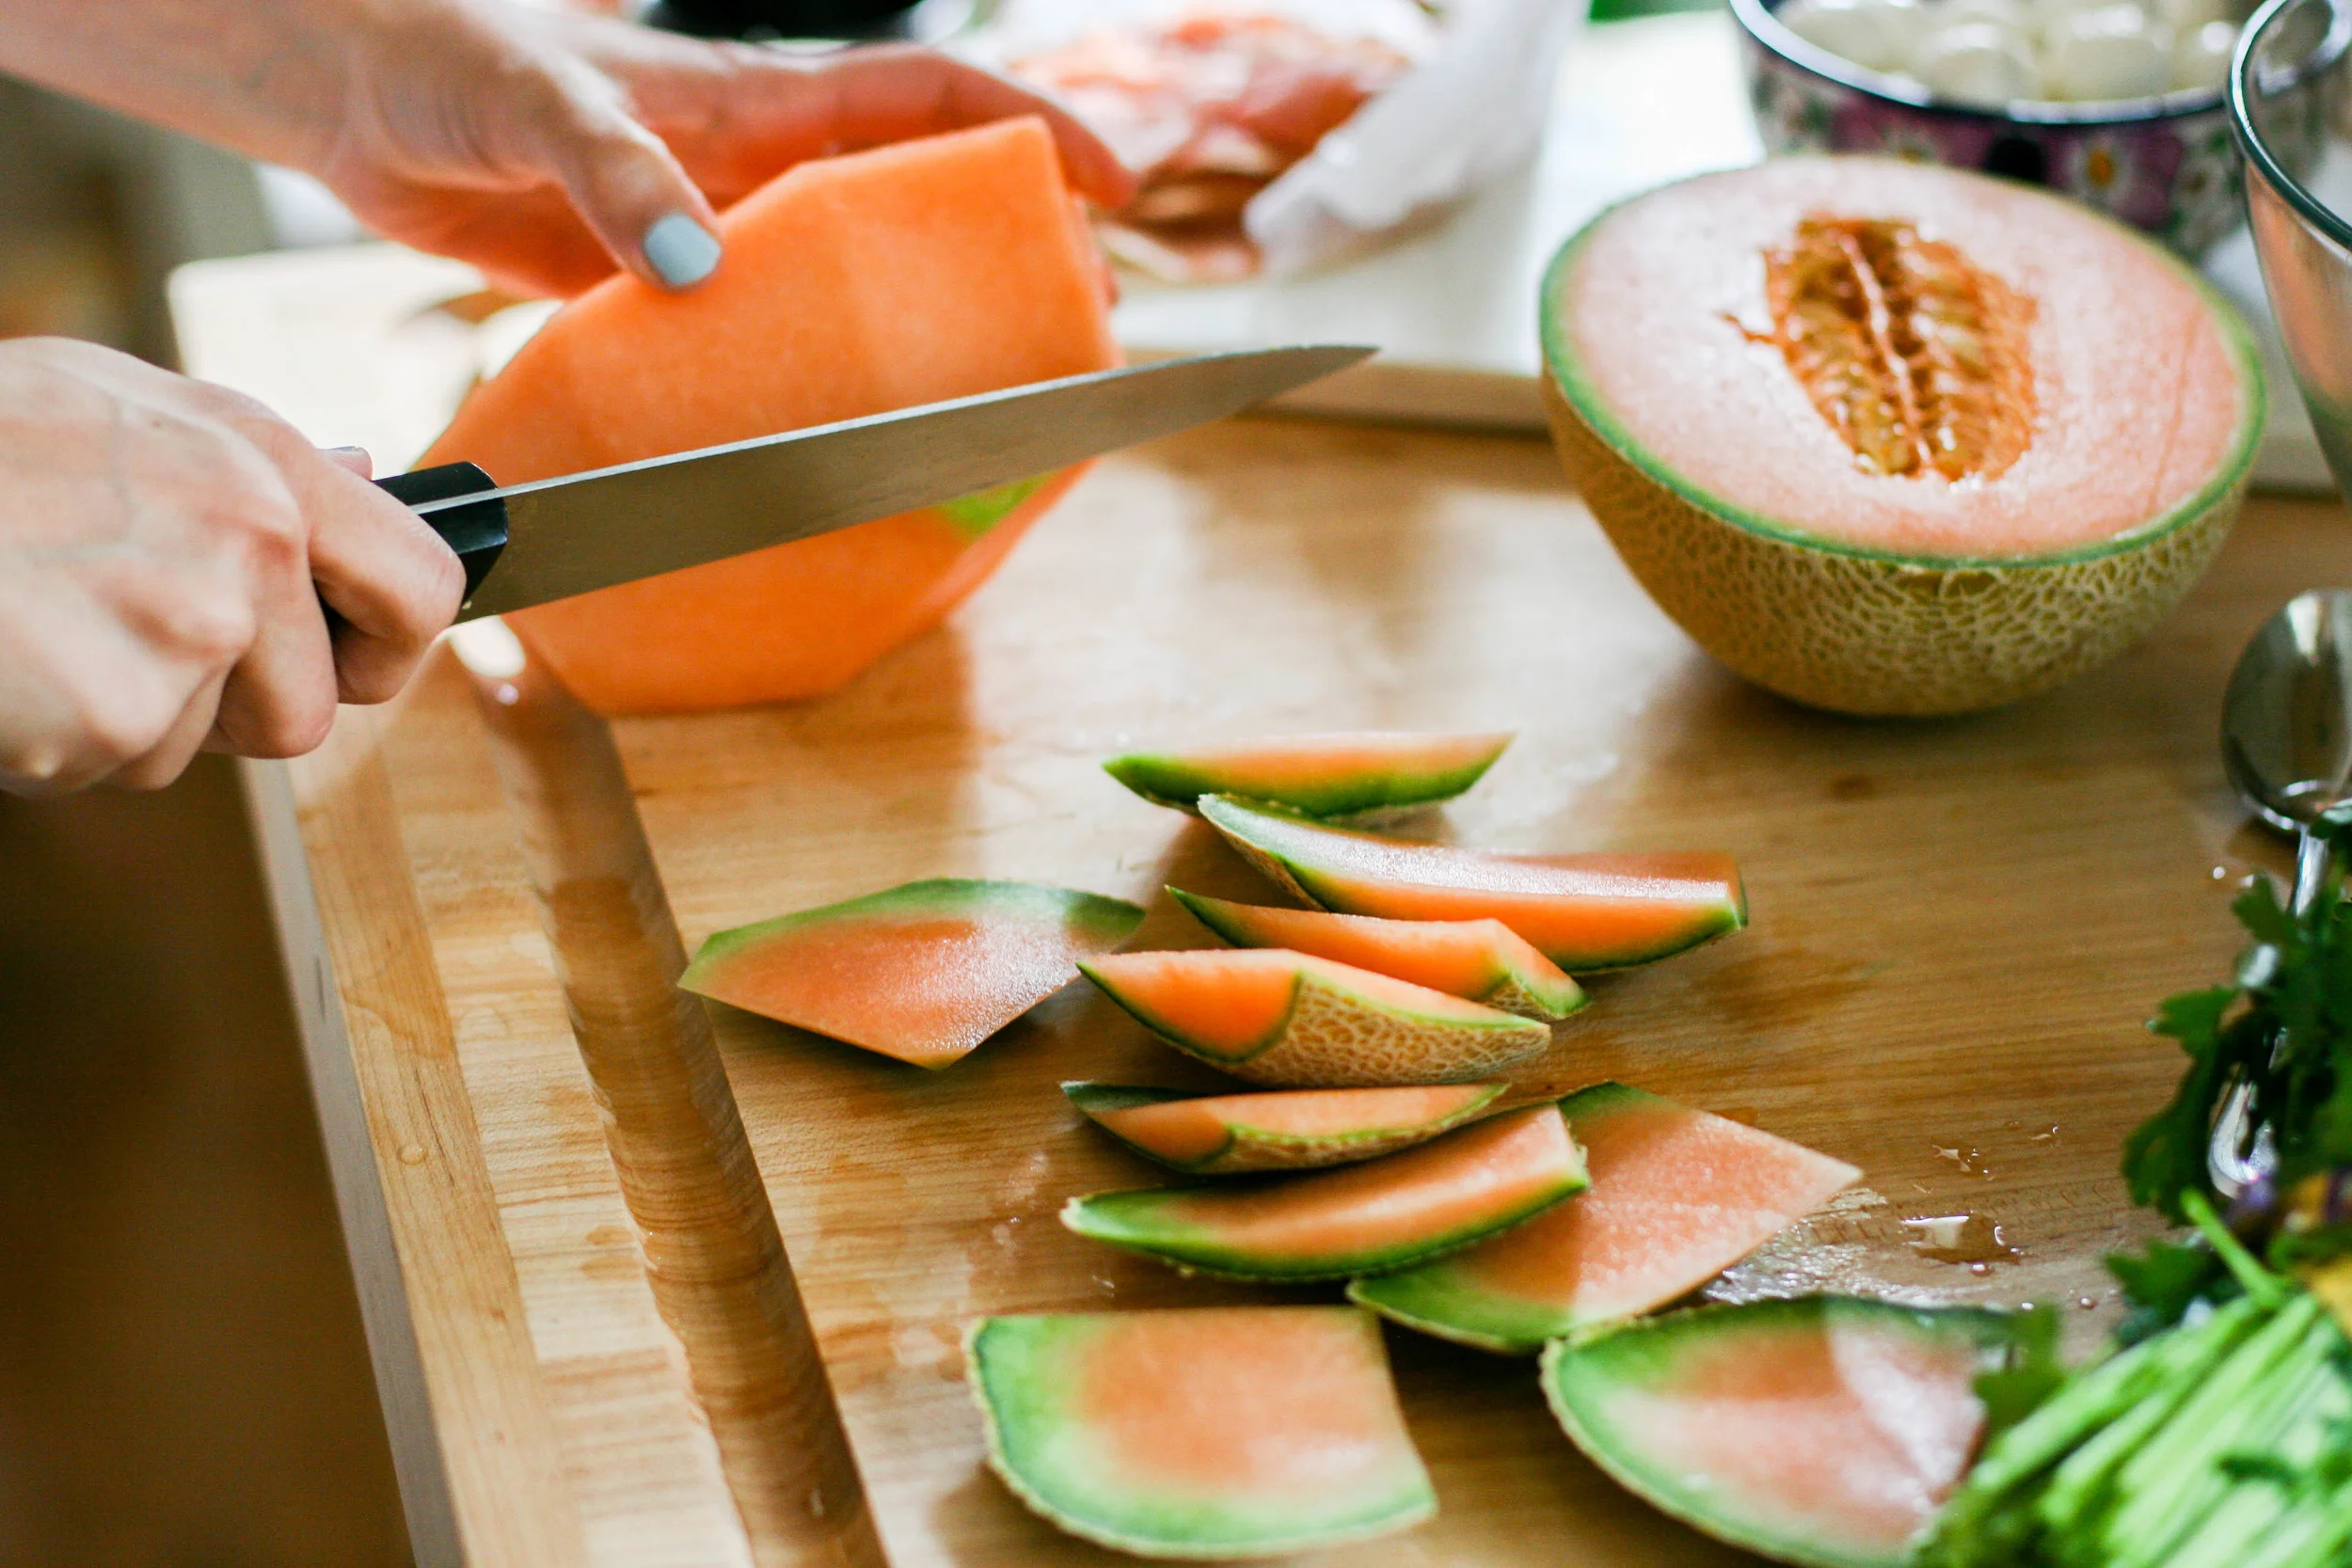
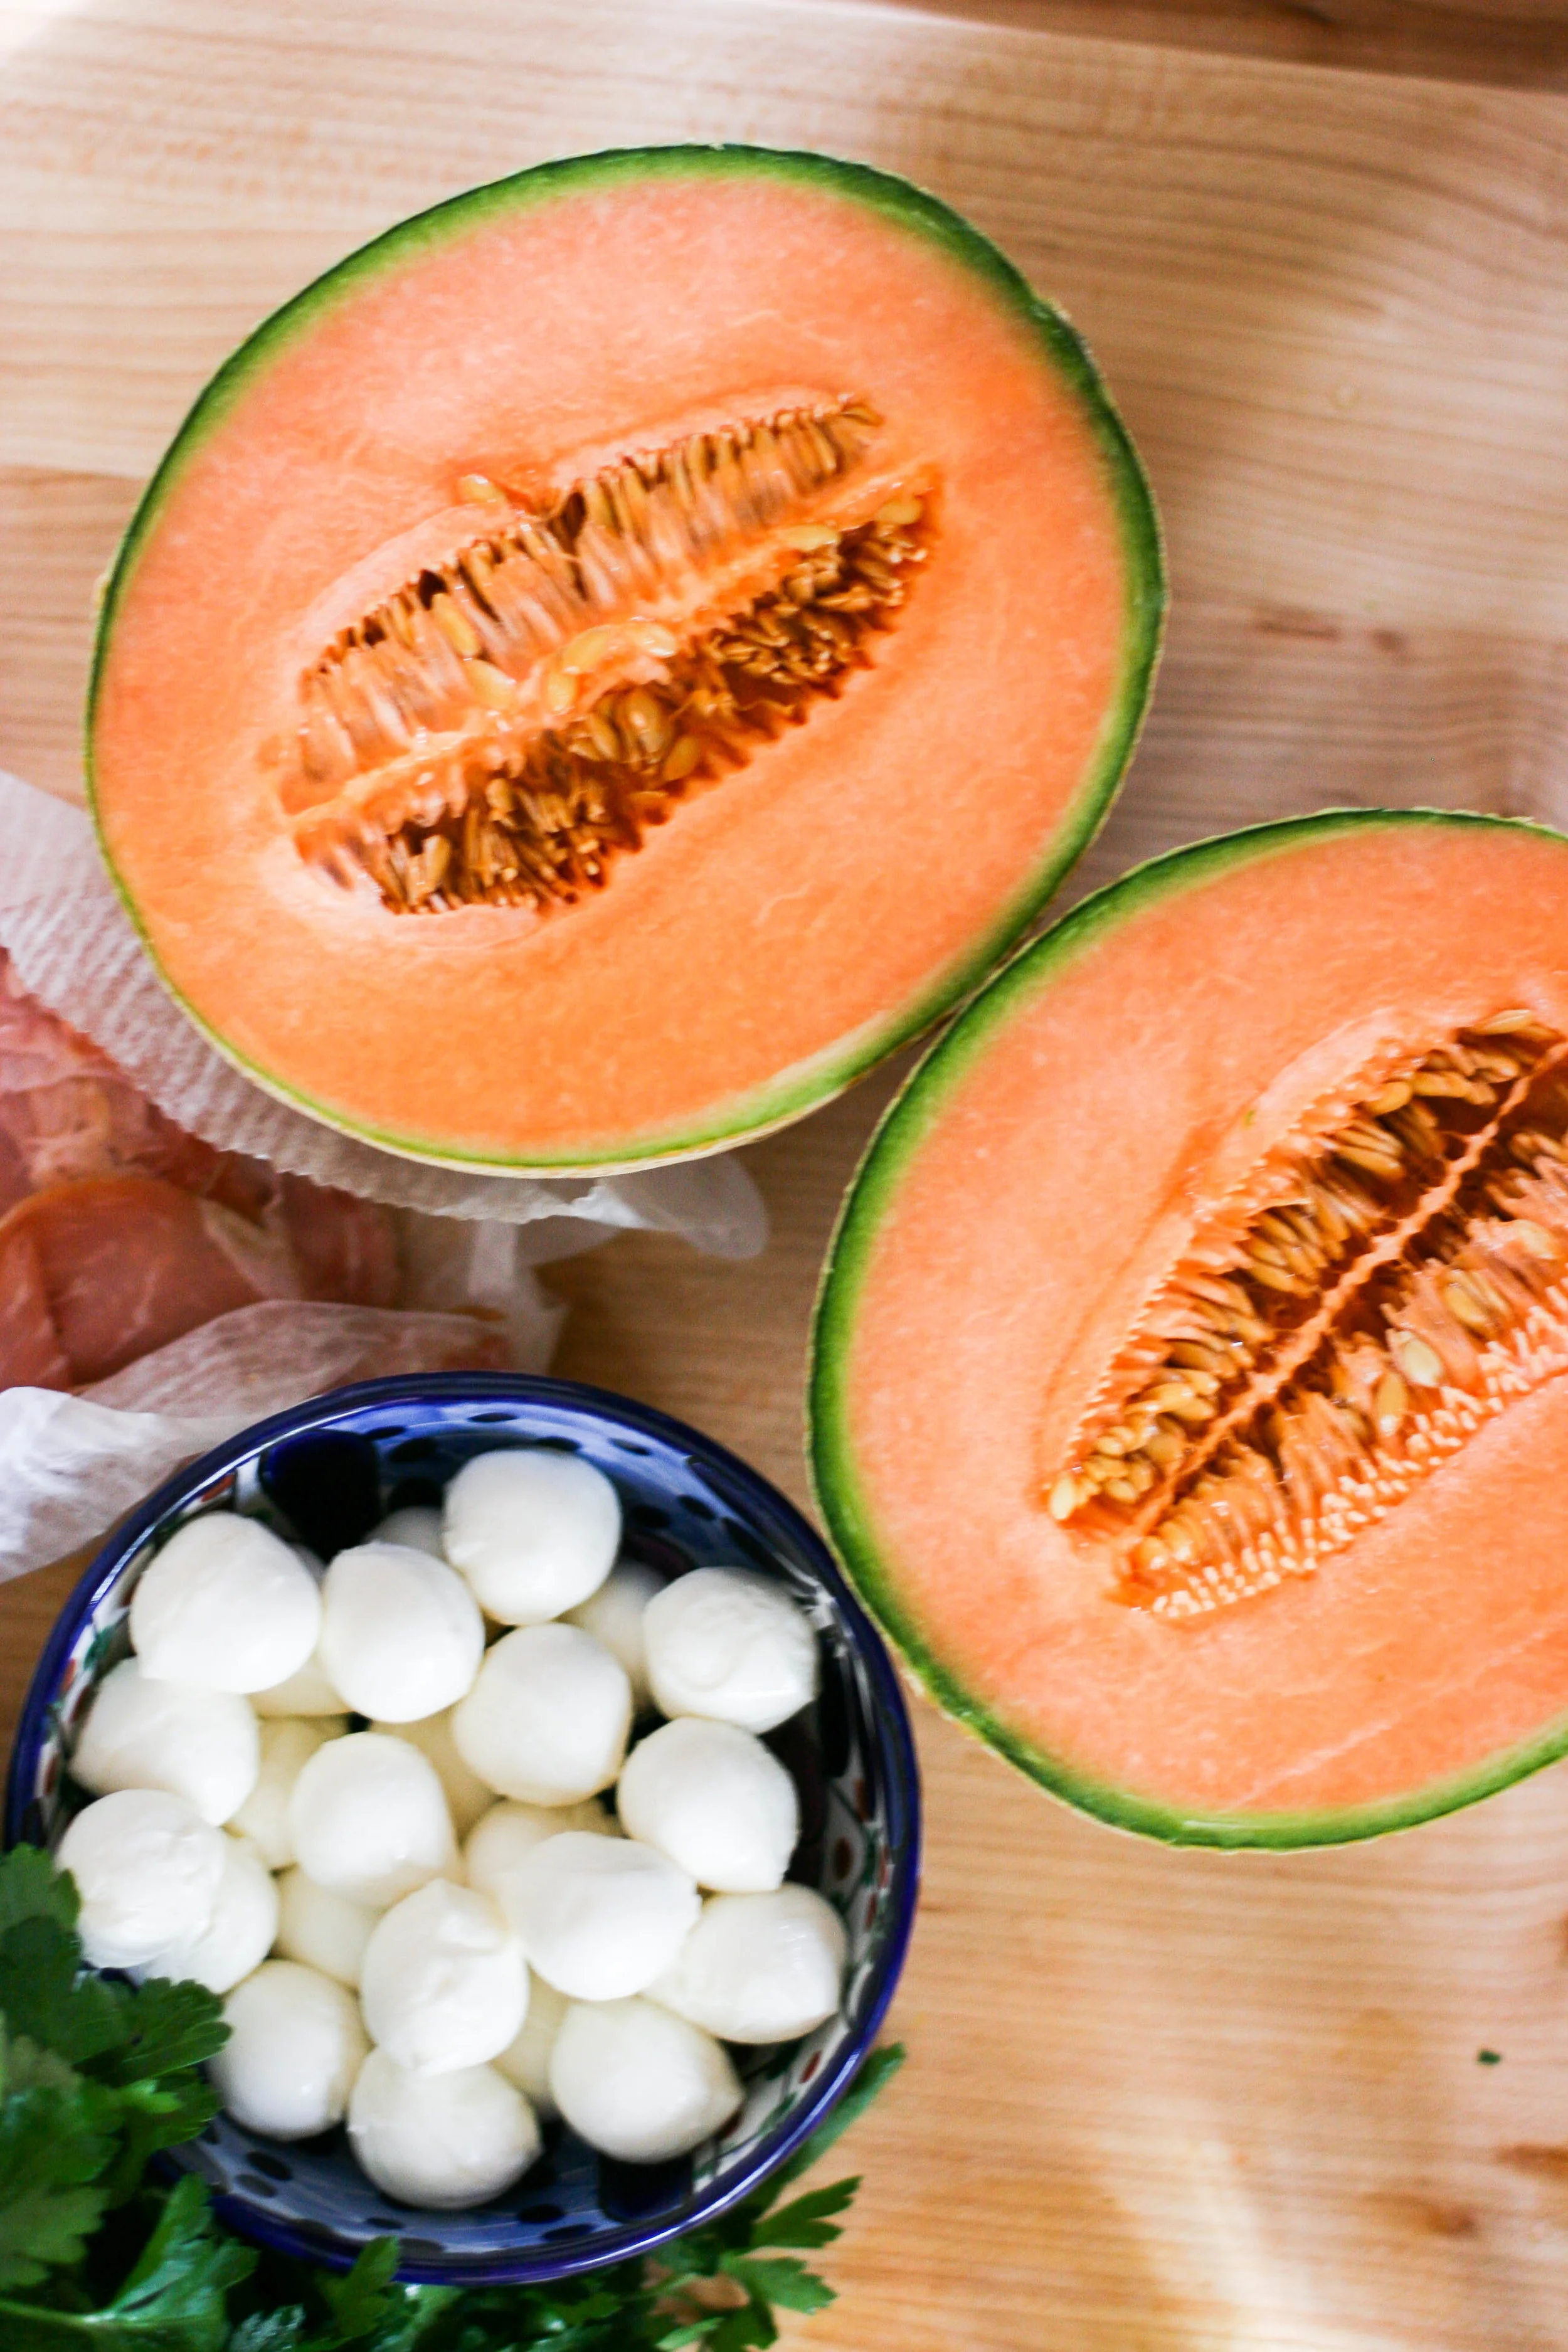
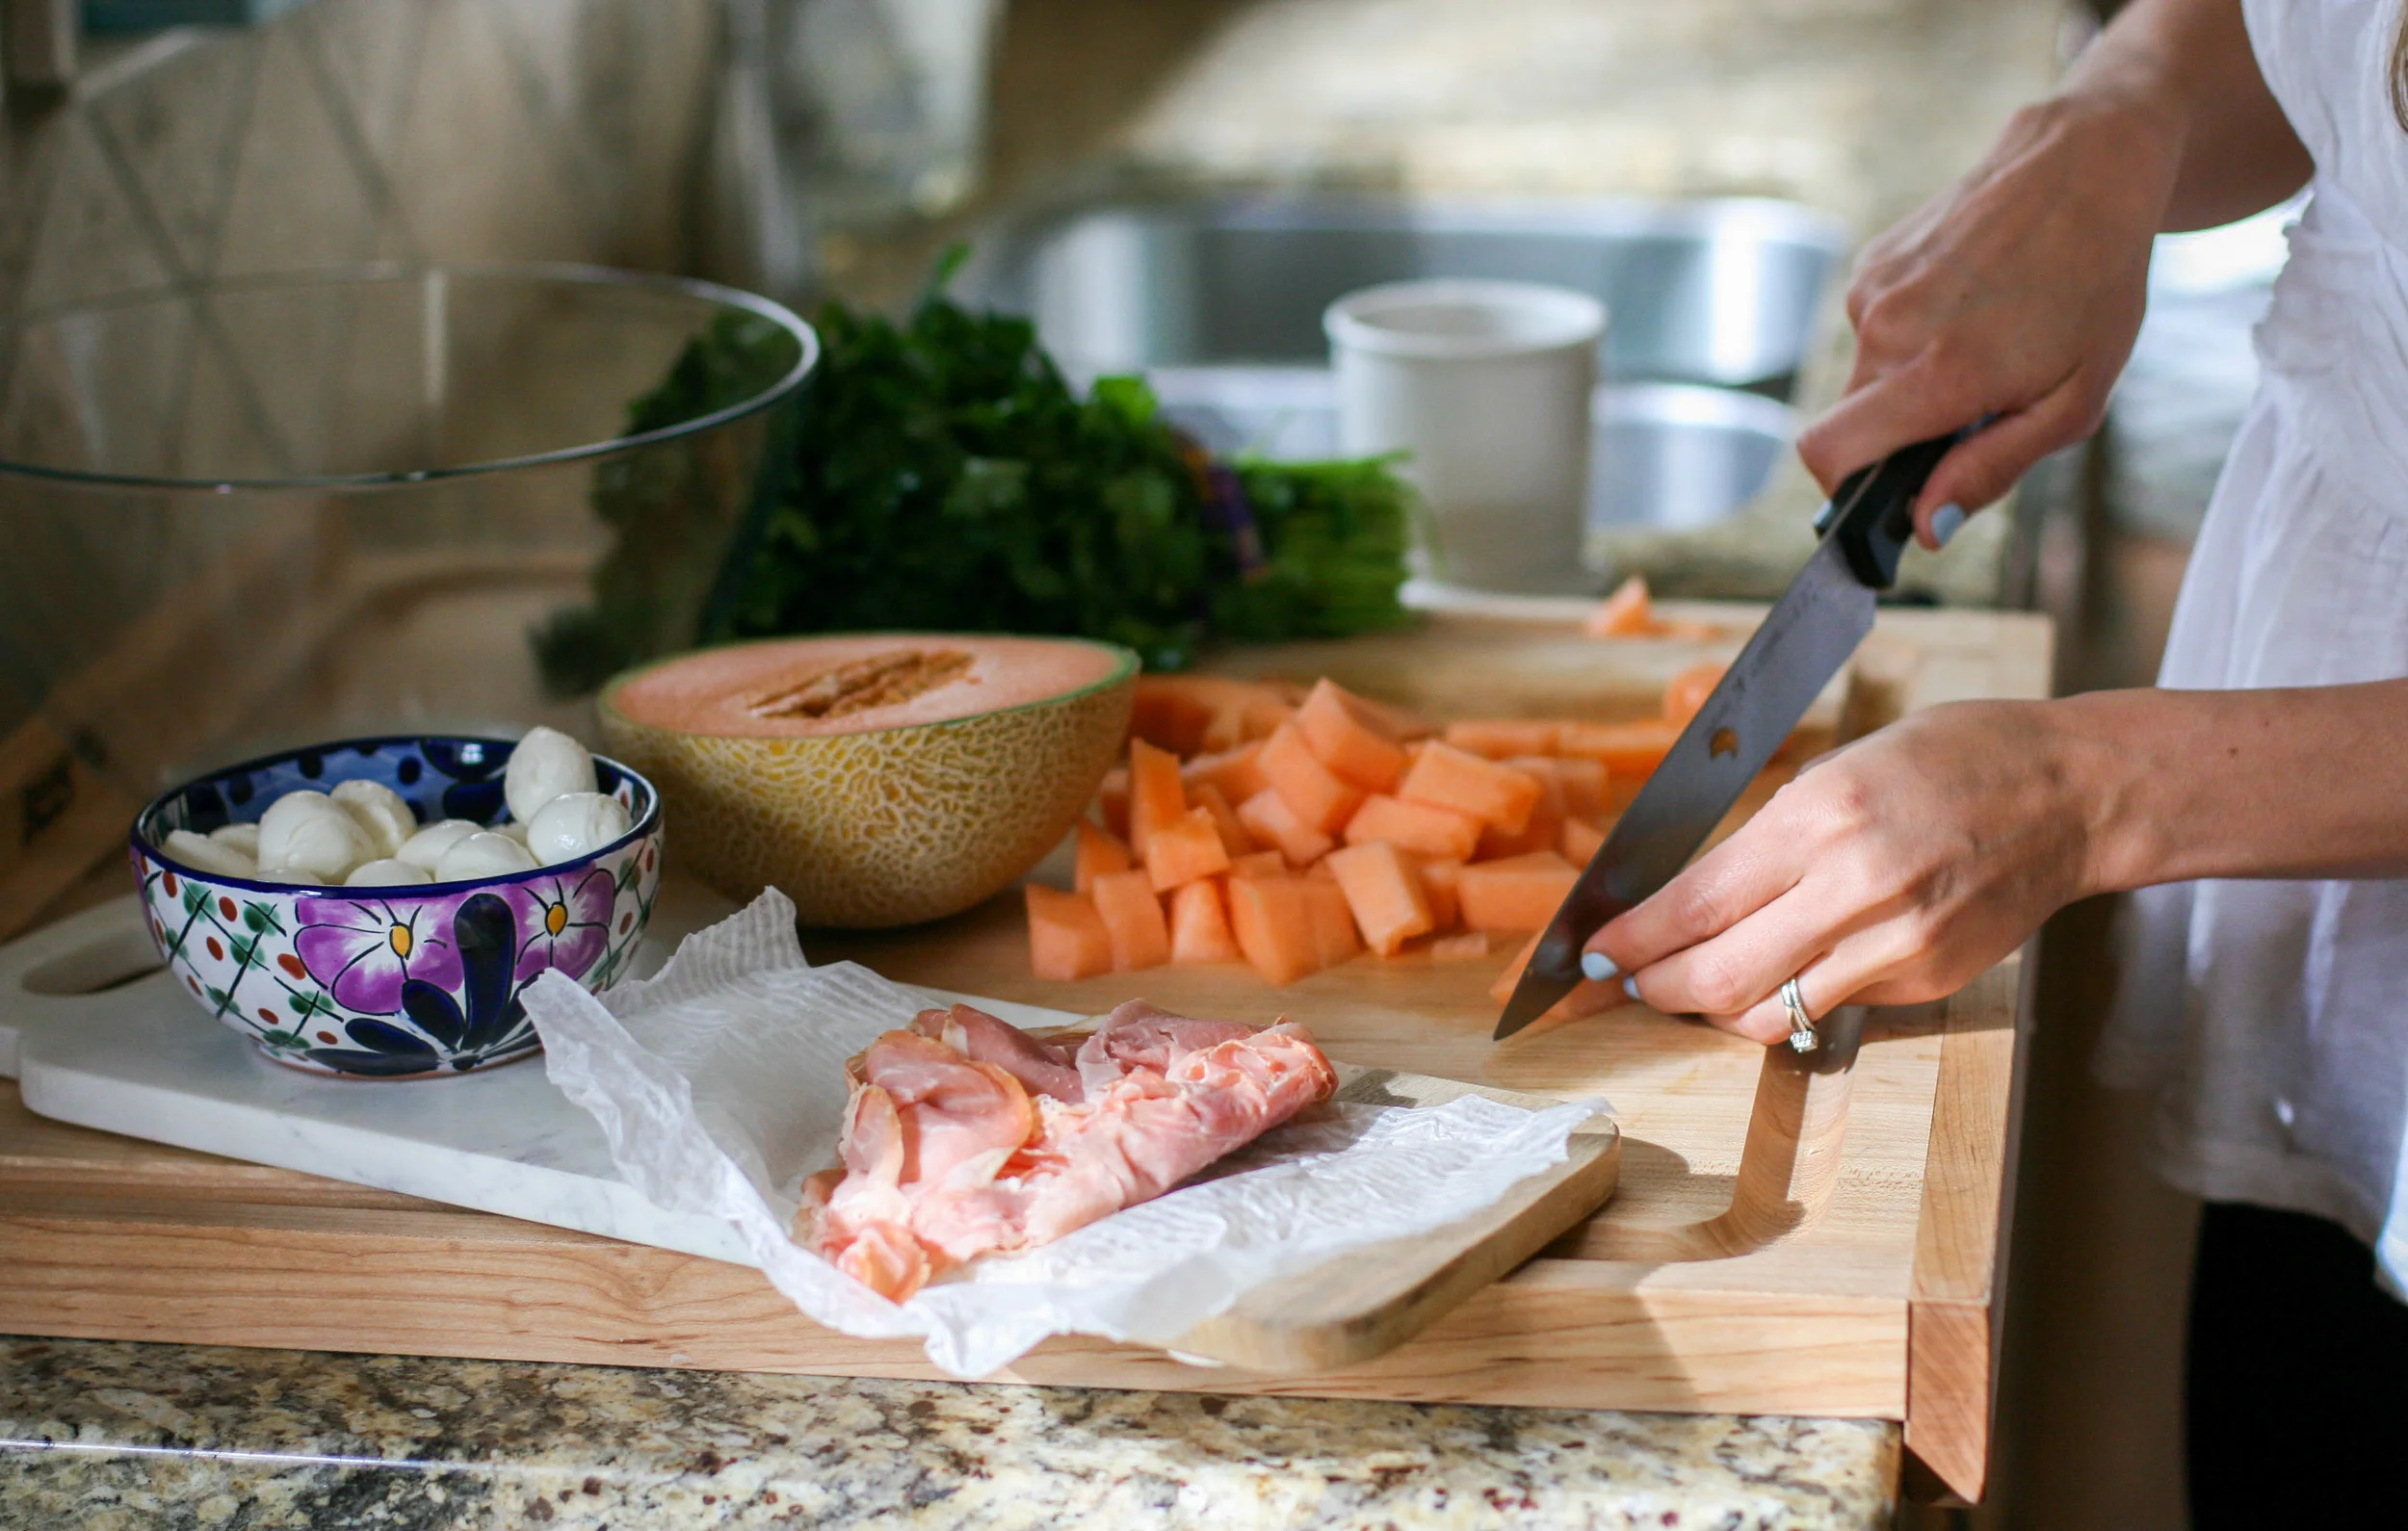
- 1/2 medium cantaloupe, cut into 1-inch cubes
- 1/4 lb. thinly sliced prosciutto
- 20 small mozzarella balls (found in the fancy cheese section of your grocery store)
- 1 handful fresh parsley, chopped

Method:
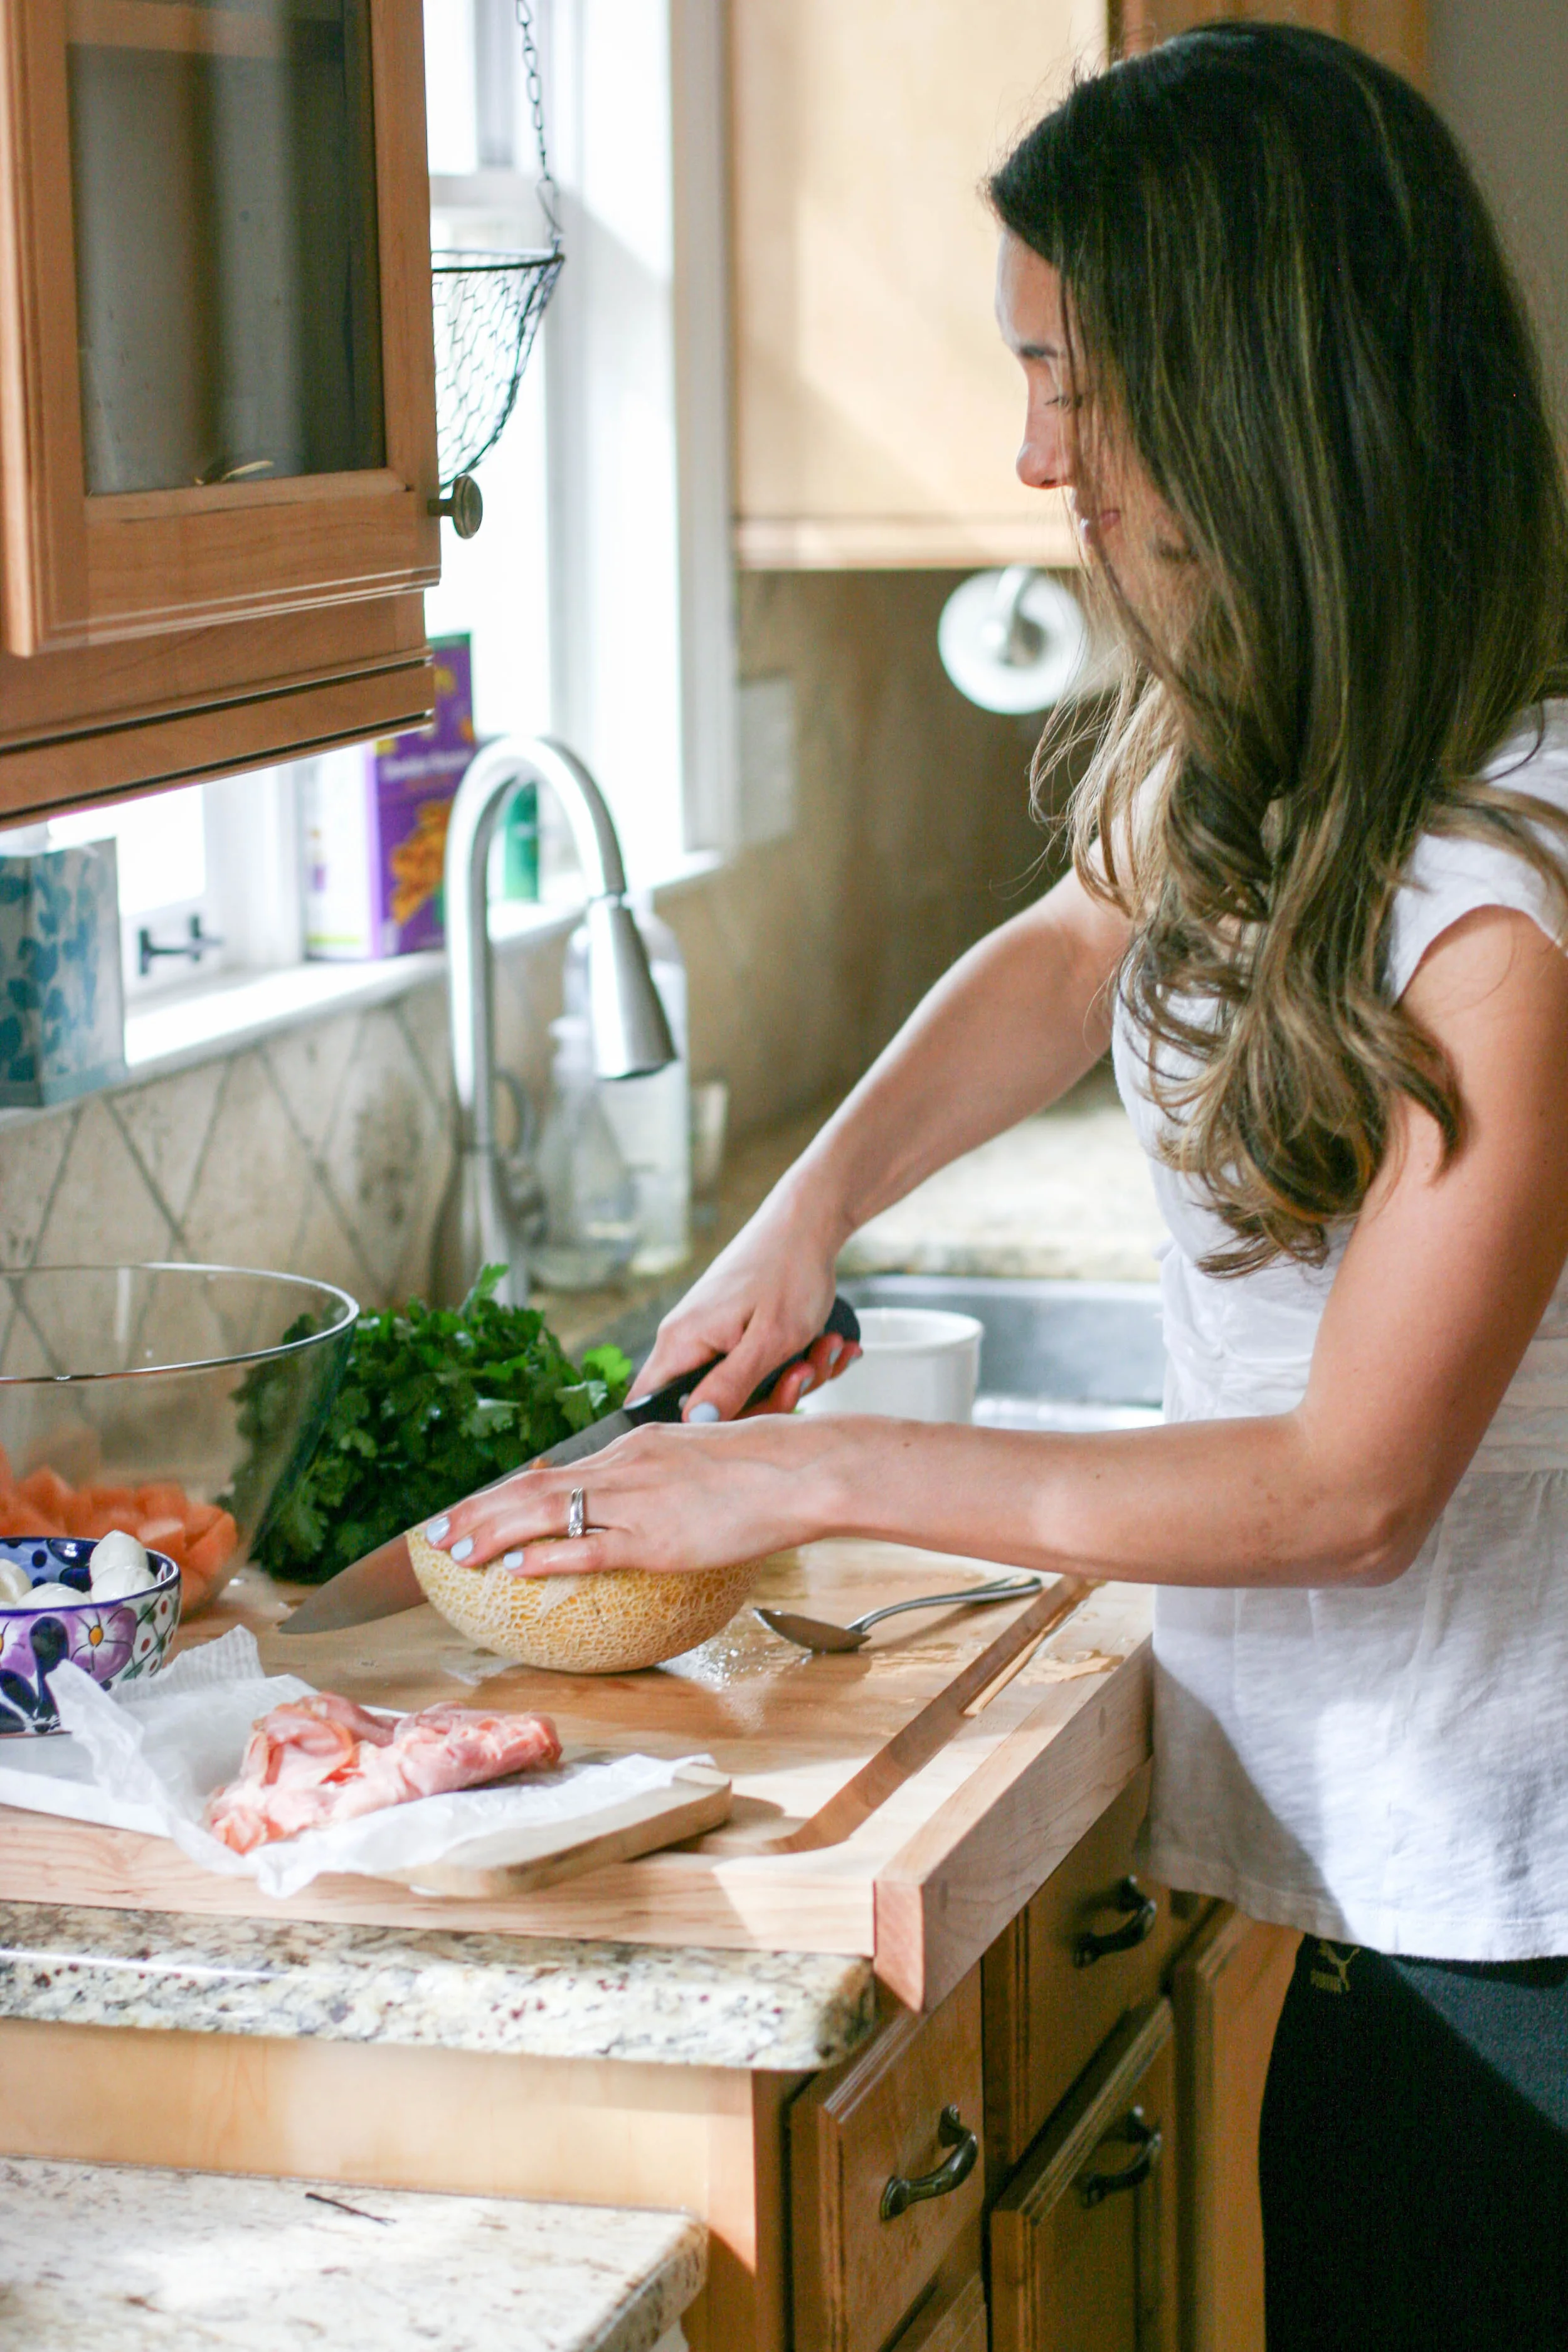
1. Layer onto a toothpick in this order: a cube of melon, a folded slice of prosciutto and a mozzarella ball. Repeat this process with 20 toothpicks. Arrange on a platter and sprinkle with freshly chopped parsley. It's a simple as that!

Threading Prosciutto Melon Mozzarella Skewers3.jpg

There you have it! Your next party plate. Let me know if you decide to give this one a try, friends!

How to Make Your Own Roasted Pumpkin & Apple Butter.

Happy Wednesday, friends! I promised you last week that I would share my roasted pumpkin & apple butter recipe with you, because I love you, and you're worth it, and because you need this butter in your life. Every single fall day. And actually, it's not butter at all, it's just that consistency and it's perfectly used like butter. Only better. It's BETTER BUTTER. It's so easy to make, you guys. This recipe just kills me, because it's SO easy and the outcome tastes like something out of Martha's kitchen. I truly feel like a little southern belle, keeping a stockpile of this in my fridge during the cooler autumn/winter months. It's delicious on anything - spread on toast, mixed into oatmeal, dolloped on yogurt, eaten with ice cream, smeared on baked chicken - the possibilities are literally endless. Literally. Just grab a few mason jars (I love these and these for canning), your crockpot and let's do this thing!

Roasted Pumpkin & Apple Butter.
Ingredients:
- 1 Sugar Pumpkin
- 5-6 apples, different varieties
- 1/4 cup maple syrup
- 1 tsp. pure vanilla
- 1 tsp. cinnamon
- 1/5 tsp. Nutmeg

Method:
1. Heat oven to 350 degrees. Now throw your pumpkin in there. Just kidding! You have to wait for it to heat up - silly rabbit. But in all seriousness, don't bother attempting to slice that pumpkin - just put in on a baking sheet and roast it whole in the oven! It's seriously so much easier than almost hacking off your arm in an attempt to pre-slice it. There's no need. Once it's good and roasty, we can easily slice it and scoop out the seeds. So once the oven is preheated, place the pumpkin in the oven and roast it for 45 minutes. This is when you watch Netflix and chuckle to yourself about how domestic you are, ROASTING A PUMPKIN. Maybe Instagram it. It's that good.

Don't look too closely. I desperately need some new baking sheets. I have my eye on these.

Don't look too closely. I desperately need some new baking sheets. I have my eye on these.

2. After 45 minutes, remove the pumpkin from the oven. It should be incredibly easy to slice open, which is exactly what you want to do. I first cut off the stem, then sliced the whole pumpkin down the center. Allow it to sit on a cutting board and cool a bit.

I shared this photo on Instagram last week because I loved it so much. My little kitchen helper and his little apple-stealing paws :)

I shared this photo on Instagram last week because I loved it so much. My little kitchen helper and his little apple-stealing paws :)

3. Once the pumpkin has cooled and is easy to work with, go ahead and scoop out the seeds and inner stringy meat. Put those aside in a bowl - you might want to do something with that mixture later! Roasted pumpkin seeds perhaps?

4. Then go ahead and scoop out the "good stuff" - all that inner pumpkin which is so creamy and sweet and earthy. You should sneak a taste; it's so good.

5. Place all the scooped out pumpkin into a crockpot. Set the crockpot over low heat.

6. Wash and dice up all your apples. I personally leave the skins on, because it's just extra work removing them. It doesn't make a difference when the butter is finished buttering - the skin will get all roasty and melty just like the rest of the apples. So only remove the skins if you have a thing about it. You don't need to. I did mention that this is the easiest recipe ever, right? Just making sure. This is where you chuckle to yourself again.

7. Toss the diced apples into the crockpot, along with the rest of the ingredients - maple syrup, vanilla, cinnamon and nutmeg. You will already be able to smell the goodness. Now close up the crockpot top and leave it alone!

8. Let the mixture cook forever. Like, at least 6-8 hours. I prefer cooking it on low for a long time, because it just gets that good, simmered situation going. I'm sure you could cook it on high for a shorter period of time, if you're in a hurry. I didn't mind taking longer with it, because it made my house smell like an autumnal haven of pumpkin glory. BONUS.

9. Once the mixture has completely broken up and reaches an even consistency, go ahead and load the mixture into your mixer or blender. You might have to do this in batches, depending on how big your blender is. I use a Vitamix (because God is good to me, and gave me loving parents who Christmas-gifted me a Vita, which I consider my child) but that's not necessary - any blender, stand mixer or hand mixer will work perfectly. Pulse the mixture on high for just a few moments, whipping it into a buttery consistency. Do not overmix.

10. Voila! Your butter is complete! Now load it into your canning jars and dole those things out like candy. If you can stand to give it away, this makes an amazing gift. I normally end up standing in the kitchen, eating the hot butter for like ten minutes before I can even bear to begin canning it. This recipe should make 4 16-oz. jars of butter. Unless one of those jars "suddenly disappears."

Eat and eat and eat and eat. This butter is shown with my Pumpkin Beer Bread recipe. Which is just a really good direction to go with it :) Let me know how this roasted pumpkin & apple butter goes for you friends! Happy buttering to you!

Goat Cheese & Pistachio Stuffed Bacon-Wrapped Dates.

It might be fall festival season for you, but in my world, it's wedding season! I am so excited to be celebrating the upcoming nuptials of one of my oldest friends AND my baby sister. Separate weddings. They aren't marrying each other. Two weddings. One week apart. One week away. Both occasions are coming up fast and the celebrating has already begun with showers and parties and gift wrapping and hoopla. Speaking of, I really need to pick up my dress from the alterations place. MENTAL NOTE. But anyway, in honor of this joyous season, I wanted to share one of my favorite go-to party dishes, because even if you're not celebrating a wedding, these are great holiday appetizers. And this one is SO easy, you will thank me. I'm preparing myself now - because you WILL thank me. Here is a twist on the traditional bacon-wrapped date:

Ingredients:
- 1 package of nitrate-free bacon
- 1 package of fresh dates, pitted
- 4 oz. goat cheese
- 1 package pistachios, crushed

Method:
1. Preheat the oven to 425 degrees.
2. Stuff each date with a hefty helping of goat cheese.
3. Go ahead and stuff some pistachios in the date, as well.
4. Cut each piece of bacon in half (sometimes I even do thirds).
5. Wrap each date with bacon. Place the date with the bacon's seam side down on a baking sheet.
6. Bake at 425 for 10 minutes. Flip the dates, then bake for another 5-7 minutes.
7. Remove the dates from the baking sheet, allow to cool. Spear each date with a toothpick, and transfer to a serving platter. Boom! You're holding the best appetizer in the room. I promise :)

Seriously though. If these dates don't get eaten, then BONUS. You get to take them home and scarf the whole plate yourself. While watching Gilmore Girls on Netflix. But seriously, if you take these to a party and they don't get eaten - I will pay you $5. Because that's how confident I am in these delectable treats. FIVE DOLLARS CONFIDENT.

Happy wedding weekending to me. Happy hosting, to you!

Boiled Artichoke with Lemon Butter.

It's almost sinful, this artichoke with it's bit of butter. It's simple. Easy to make. Requires just a tad of patience. But it's sincerely decadent, because the flavors are so rich and yet so light. The taste of the artichoke itself is just so nom-nom-nom, merely enhanced by the tangy citrus butter. This recipe isn't complicated or unveiling some secretive sauce. It's really simple, really easy to make, and really really good. I make this as an appetizer for Stevie and myself if we're settling down to a good Friday night movie. It just feels special and different, and you know, like fancier weekend eats. I also make it for lunch, usually followed up by a salad. It's sort of messy and fun, so it's great to share with a dear friend who doesn't mind your butter-smeared cheeks.

Ingredients:

- 1 artichoke

- Juice of 1 lemon

- 2-3 tbsp. butter (I prefer Kerrygold, because whoa.)

- Salt and pepper to taste

Method:

1. First, you want to cut off the stem of the artichoke at the base. Then, if you're into following the rules, you can trim the top 1/3 of each leaf on the artichoke. Or if you're like me, you can just not.

2. Bring water to boil in a 3-qt. stock pot. Once it's reached a rolling boil, reduce heat to medium, and drop the artichoke halves in, with the insides facing down in the water. Boil for 20-30 minutes until the leaves turn bright green and the artichoke has softened.

3. Combine the squeezed juice of 1 lemon with the 2-3 tbsp of butter and melt together. I've started doing this in the microwave, but if you want to achieve a thicker glaze, you can heat it in a saucepan over the stove. That's probably what the good wives do. Wherever they are. Probably wearing pearls in their kitchen.

4. Drain the artichoke and serve with the lemon butter immediately! You just peel each leaf off, dip the innermost part of the leaf in the butter, and scrape the meat out with your teeth. It's the most delectable, buttery, hilariously messy fun feast. You are going to want to pull your hair back, because your face might somehow end up planted in the butter sauce. It's that good. Truly.

Let me know if you dare try this. You won't be sorry, friends.


TASTE: Broccoli Apple Slaw

Broccoli Apple Slaw.

Happy Earth Day! Today I'm bringing you the latest installment in this month's roundup of unusual salads and I'm just gonna go ahead and say it - this one is a home run. Because everyone that tastes this slaw wants more! And it's composed of completely raw veggies (and a few other goodies), which is especially healthy. Woohoo! Add in some sweet and savory elements, drizzle on some good dressing, and you've got yourself and healthy healthy lunch, my friends.

Ingredients:

- 1 package Broccoli Slaw (in the salad section of your grocery store - usually contains shredded broccoli, cabbage and carrots)

- 1 Granny Smith Apple, diced

- 1/2 cup Dried Cranberries

- 1/2 cup Goat Cheese

- 1/4 cup Pecans, chopped

- Your choice of Balsamic Dressing (this one is my new favorite, you can find it at Kroger in the organic section)

Method:

1. Combine the slaw, chopped apple, cranberries, goat cheese and pecans in a mixing bowl.

2. Drizzle on your balsamic dressing.

3. Voila! I told you this one was easy!

You might find yourself making this over and over again, because it's so simple to throw together, super hearty and filling, and just plain fun. Let me know what you think!